


Review Summary
The Solo 3 introduces significant upgrades over its predecessors. It boasts a larger chamber accommodating the newly introduced “XL” stems, doubling the herb capacity and enhancing flavor, vapor production, and potency. The Solo 3 also features a new “on-demand” mode, which works flawlessly. Both modes are customizable and produce excellent extraction and consistent performance. The Solo 3 makes up for its large size with amazing flavor quality, battery life, and extraction efficiency. It is a top-tier vape that I can easily recommend to new users and advanced users alike.
- • #1 on Best overall
✓ Pros
- Pure vapor, exceptional vapor quality
- Easy usage and cleaning process
- Dual modes- session + on-demand
- New XL Stems, larger chamber
- Long-lasting battery
✗ Cons
- Large and more suitable for home use
- Price tag may be a barrier
Pricing Info ⓘ
Comparison
Arizer Solo 3 (V2)
|
S&B Venty
|
Arizer Air 2
|
Tinymight 2
|
Pax Plus
|
|
|---|---|---|---|---|---|
| Score (1-5) |
4.9 Current Review |
4.8 |
4.5 |
4.6 |
4.7 |
| Brand | Arizer | Storz & Bickel | Arizer | Tinymight | Pax |
| Retail Price |
$299.00 |
$449.00 |
$149.00 |
$349.00 |
$150.00 |
| Release Date | April 2025 | October 2023 | October 2021 | March 2024 | November 2022 |
| Compatible With | Dry Herb, Aromatherapy | Dry Herb | Dry Herb | Dry Herb | Dry Herb |
| Heating Method | 80% Convection / 20% Conduction | Hybrid | Hybrid | Convection | Conduction |
| Vaping Style | Session + On-demand | Session | Session + On-demand | Session | |
| Body Material | Aluminum | PEEK | Aluminum | Wood | Metal |
| Mouthpiece Material | Glass | PEEK | Borosilicate Glass | Glass | Silicone |
| Heat Up Time | 15 Seconds | 20 Seconds | 60-75 | 2-5 Seconds | 20-30 |
| Precise Temp Control | ✓ | ✓ | ✓ | ✓ | ✗ |
| Temperature Range | 122-428°F | 104-410°F | 355-420°F | 248-464°F | 4 Levels |
| Oven Capacity | 0.5 | 0.25 | 0.2gr | 0.15gr | 0.5gr |
| Oven Material | Glass | Ceramic | Stainless Steel | Ceramic/Stainless | Stainless Steel |
| Glass Compatible | ✓ | ✗ | ✓ | ||
| Battery Type | Internal | Internal | Replaceable | Replaceable | Internal |
| Battery Capacity | 3200mAh | 2800mAh | 3500mAh | ||
| Sessions Per Charge | 9-12 | 8-12 | 4-6 | 6-9 | 6-9 |
| Charge Time | 3-4 Hours | 1 Hour | 2-3 Hours | 1-2 Hours | 2-3 Hours |
| Charger Type | USB-C | USB-C | Micro-USB | USB-C | Magnetic |
| Passthrough Charging | ✓ | ✗ | ✗ | ||
| Display Type | Multicolor | LCD | LCD | LED | LED Indicators |
| Smartphone App | ✗ | ✓ | ✗ | ✗ | ✗ |
| Firmware Updates | ✗ | ✓ | ✗ | ||
| Adjustable Airflow | ✗ | ✓ | ✓ | ✗ | |
| Warranty | 2 Years | 3 Years | 2 Years | 10 Years | 10 Years |
Video Review
Background
The Arizer Solo 3 is the biggest thing to happen in the dry herb vaporizer world in the last five years. Arizer is a pioneering brand that helped shape the industry into what we know today. Their previous portables- the Solo 2/MAX and the Air MAX are some of the most praised vapes ever. People who own them swear by them.

But over the years, these vapes changed very little with each new release, maintaining a similar functionality and only making minor changes between versions. Until the Solo 3 showed up.
It retails for $344, and you can use coupon code TVG20 to save 20% directly from arizer.com. That’s almost $70 off the Solo 3 at it’s current price level.
In this review, I’ll unbox the Solo 3 V2, review the design and features, usage process, talk about its new “XL” stems, its new “on-demand” mode, the performance, vapor quality, and compare it to the Venty and Solo 2. Finally, I’ll give you guys some tips to make the most out of your Solo if you already own one.
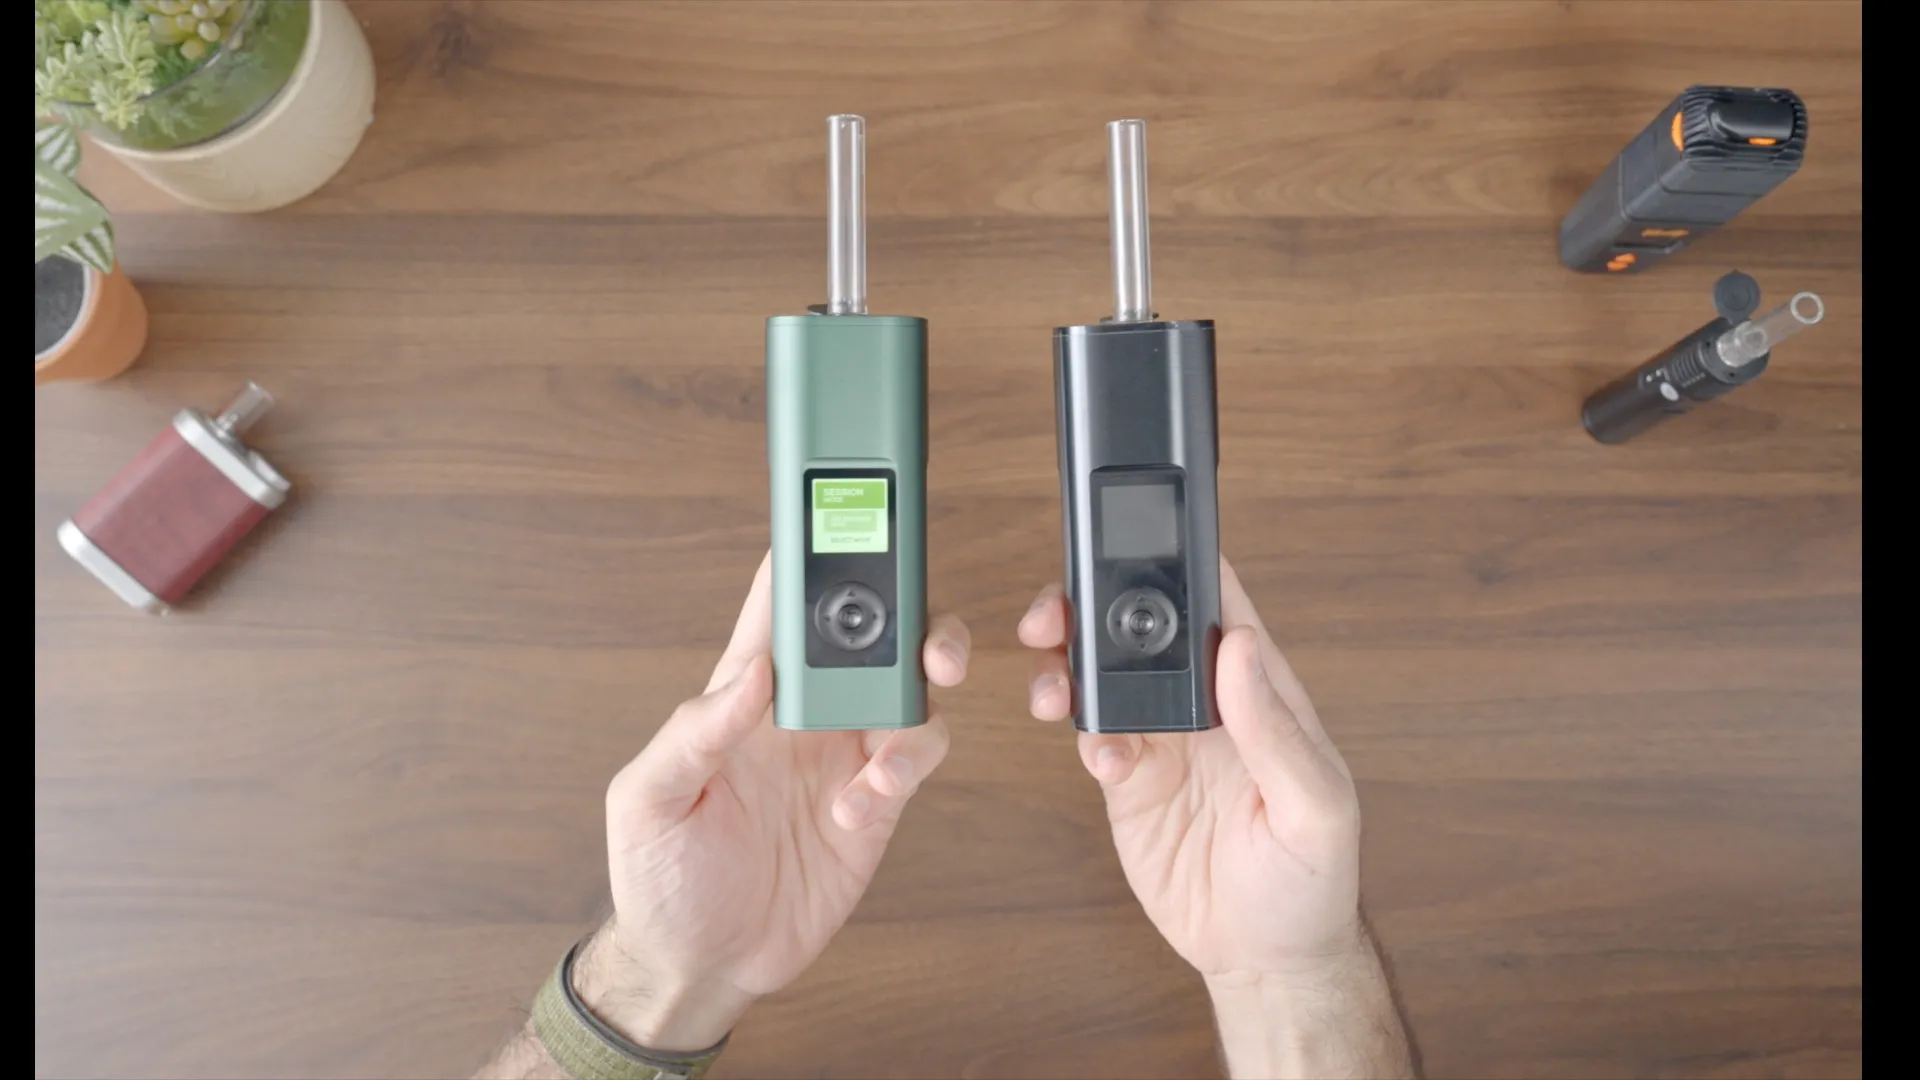
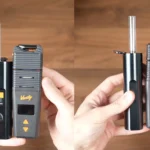
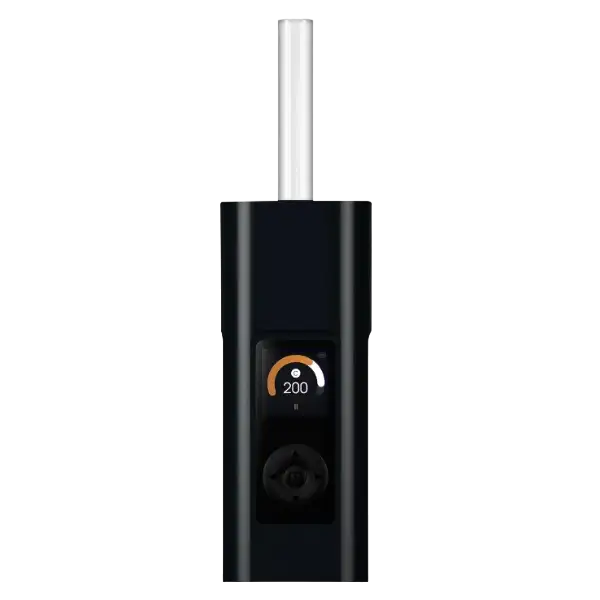
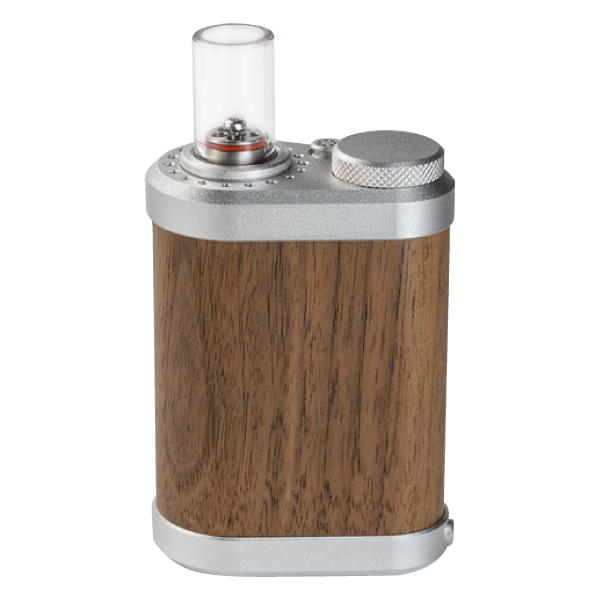
Design
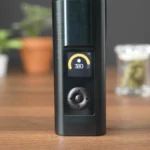
The Solo 3 is a large and hefty unit. Everything about it is larger than the Solo 2- the height, width, thickness, and even the buttons and the display are larger.
The display got a major upgrade. It now has different brightness levels and colors and is much sharper and crisper. It suddenly makes the Solo 2 look old school, as if it were released in the ’80s.
The Solo 3 has a shinier finish than the Solo 2. It still features a brushed metal casing, but it’s less matte, as you can clearly see below.

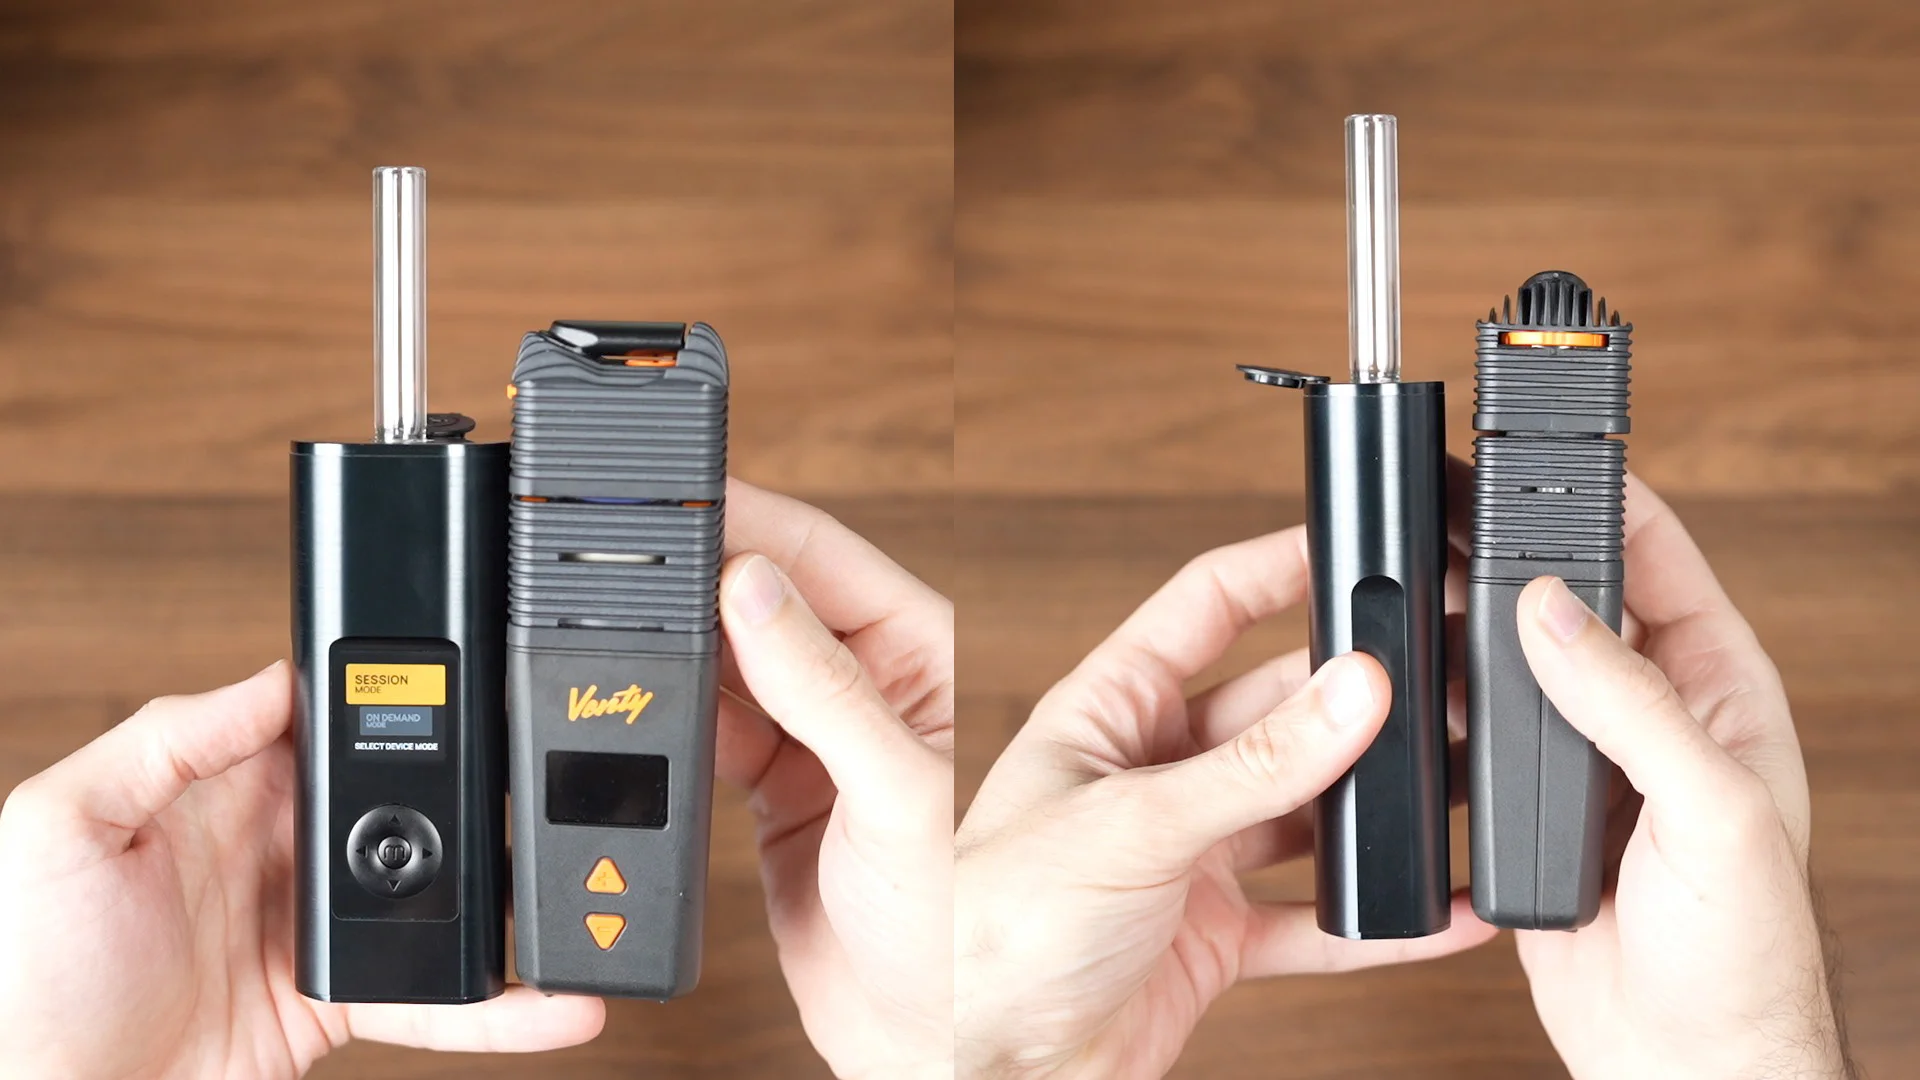
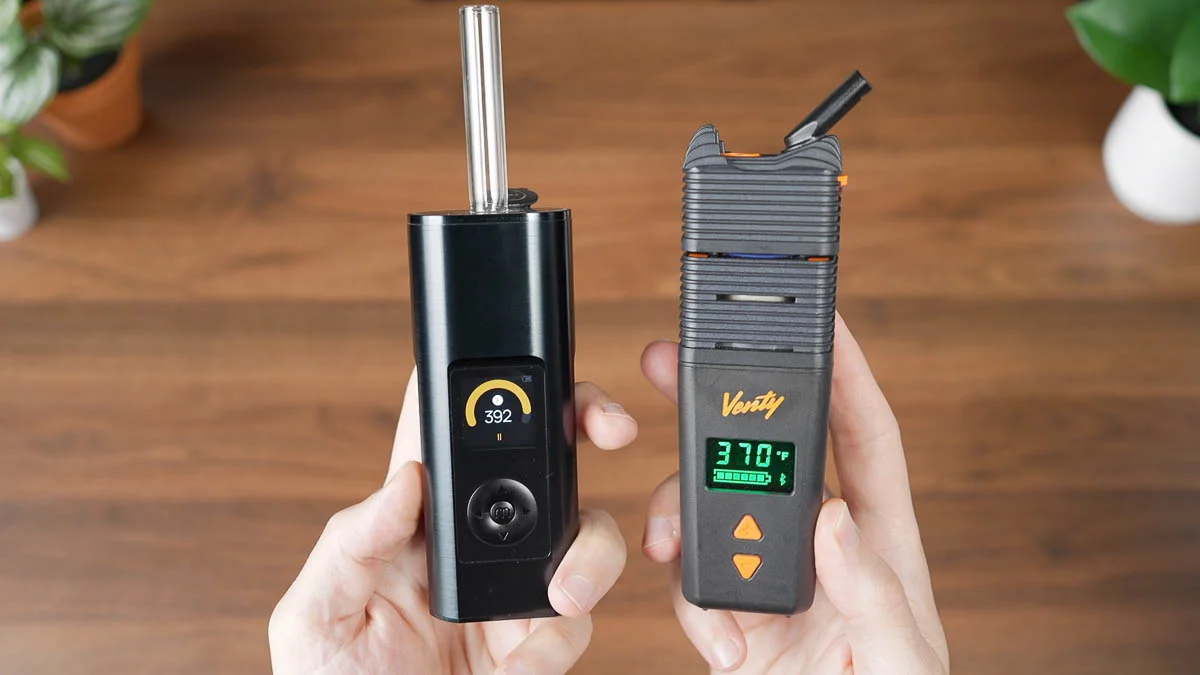
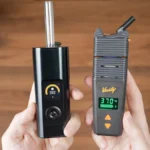
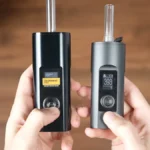
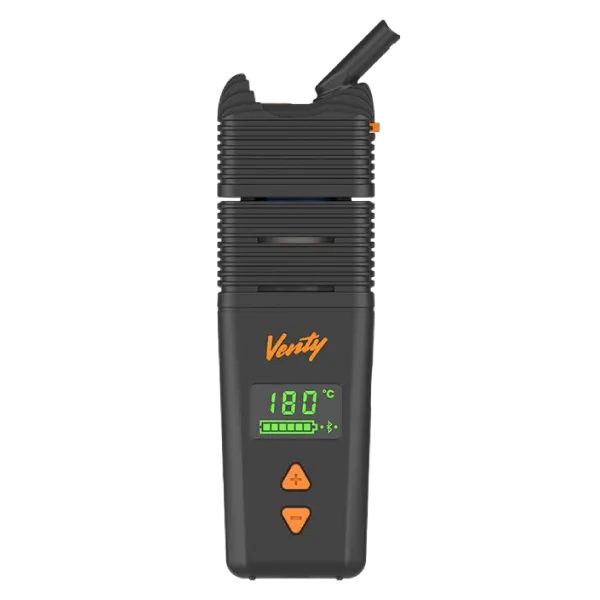
The Solo 3 is more similar in size to the Venty than it is the Solo 2. The unit itself is shorter than the Venty, but when the stem is inserted, it is slightly taller.
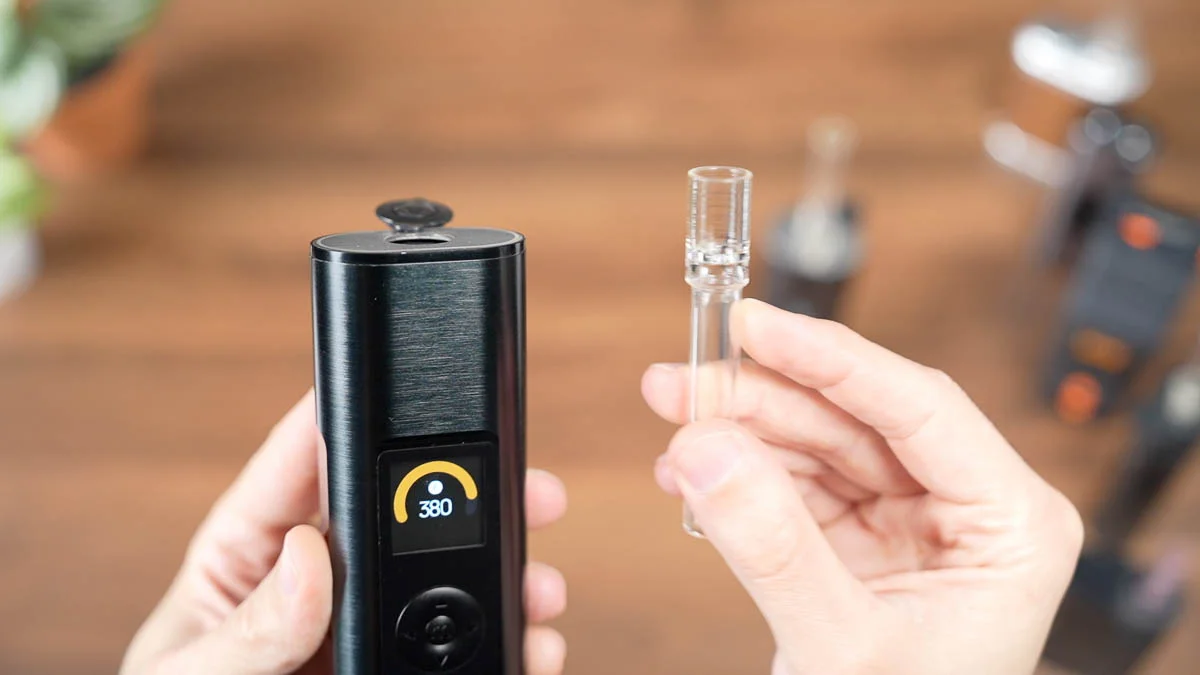
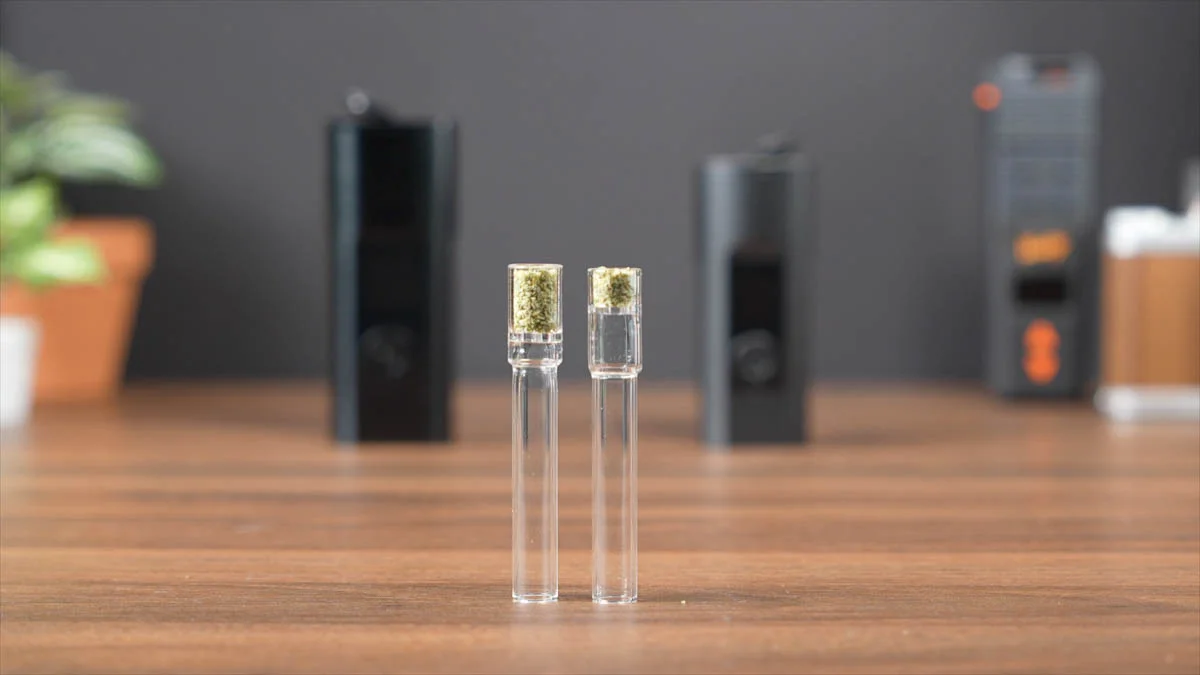
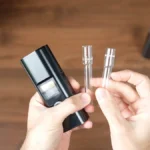
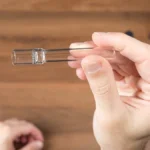
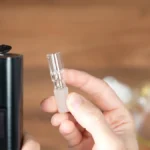
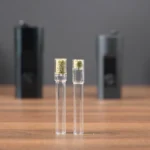
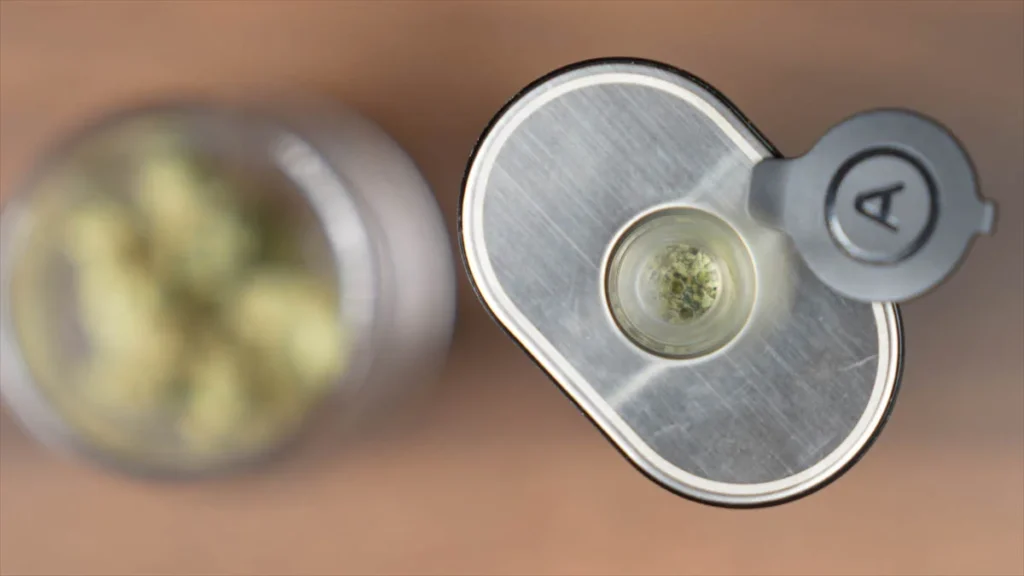
Glass Stems
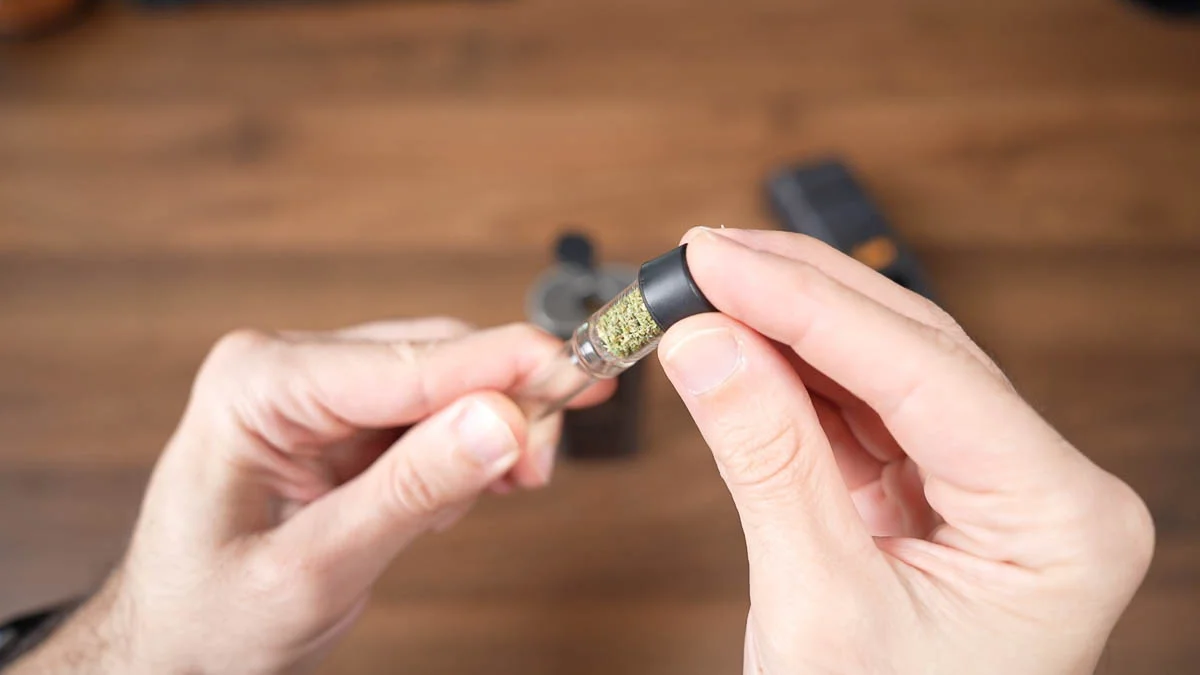
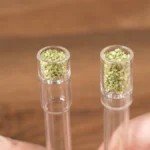
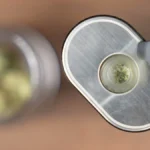
The Solo 3 features Arizers signature usage process where the herb is loaded to small cup at the tip of the glass mouthpiece, and then inserted into the chamber that sits on top.
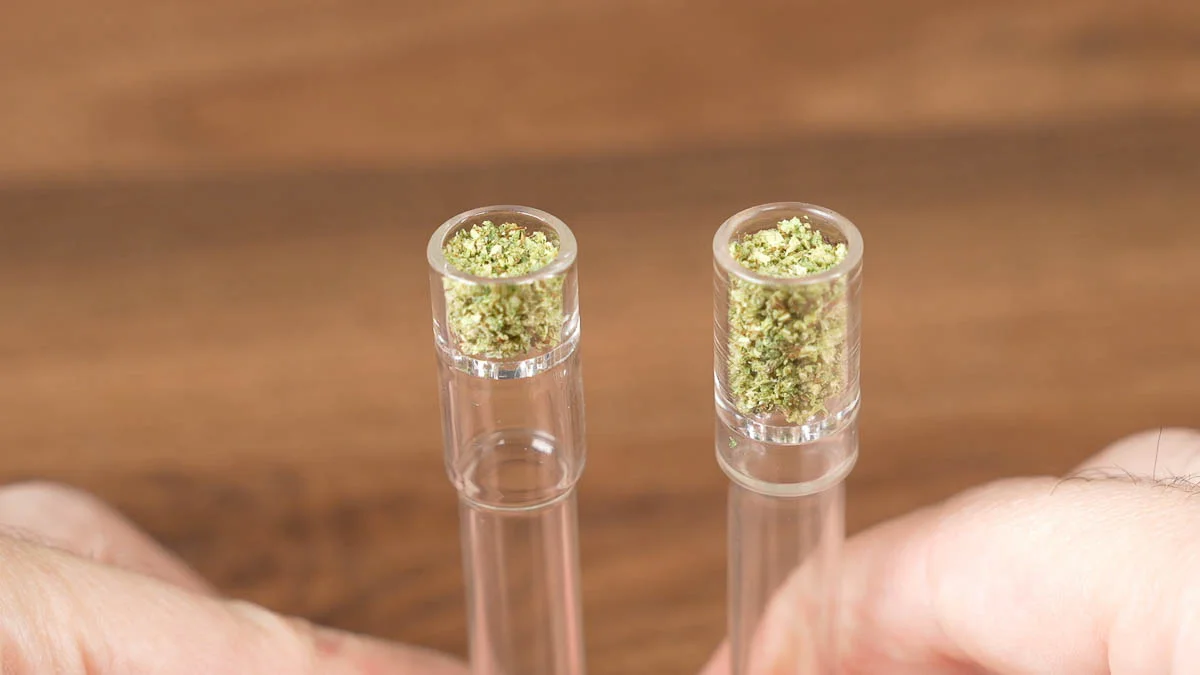
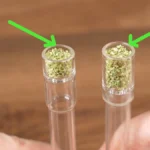
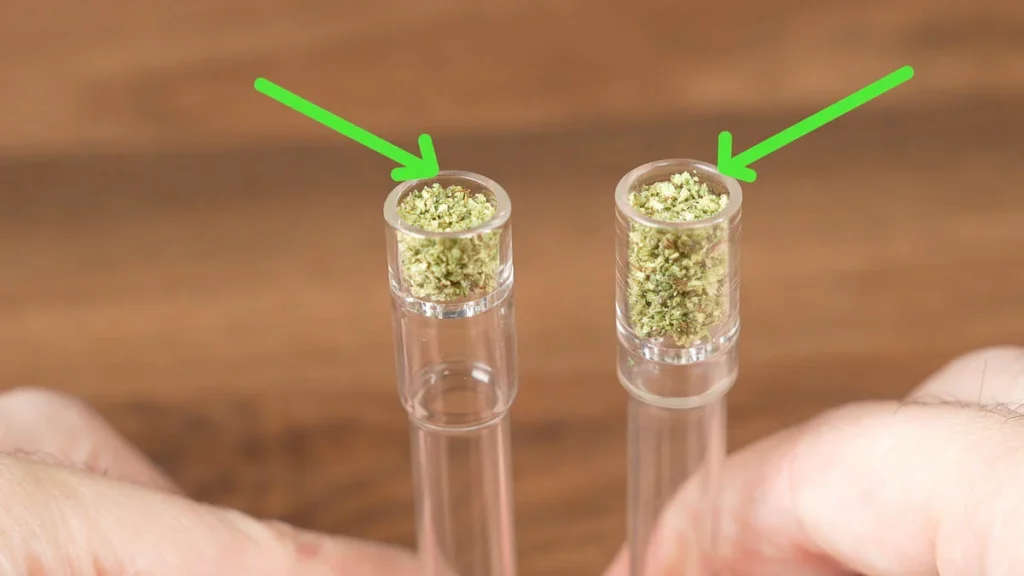
The chamber of the Solo 3 is almost twice the size of the Solo 2. It is the same diameter, but it is a lot deeper. And while the Solo 2 came only with “regular size” stems, which fit less than a quarter gram, the new XL stems can fit double the herb. And that matters. A lot. More herb means- more flavor, more vapor production, and, most importantly, more potency and effects.

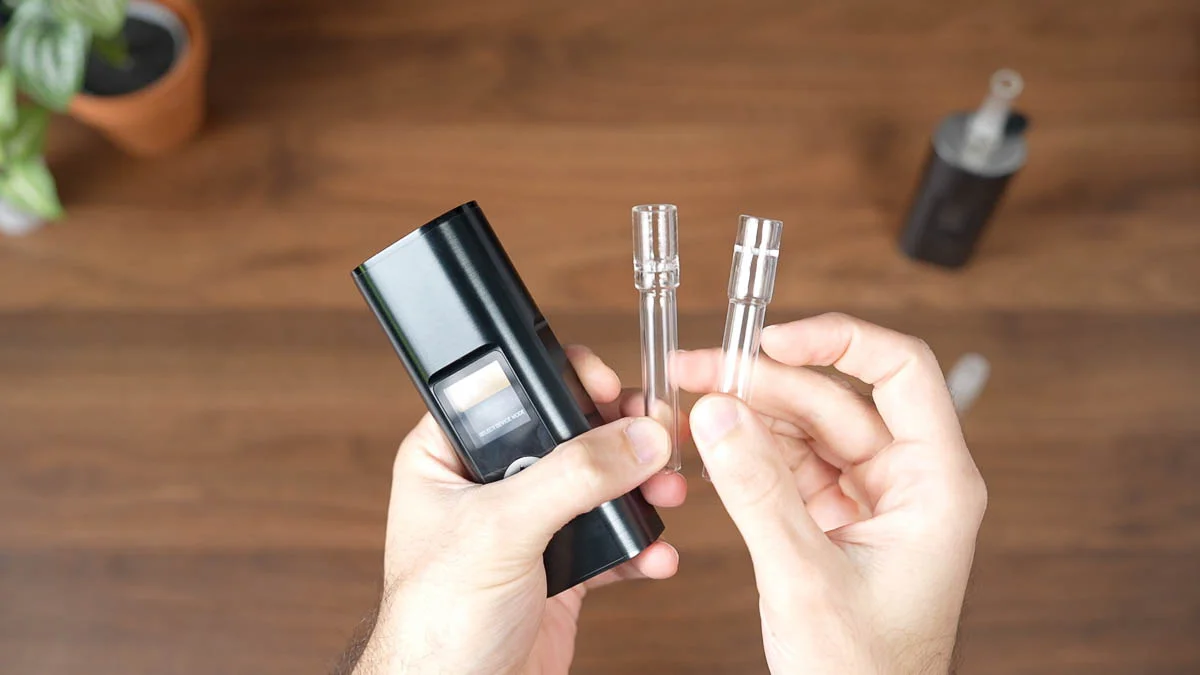
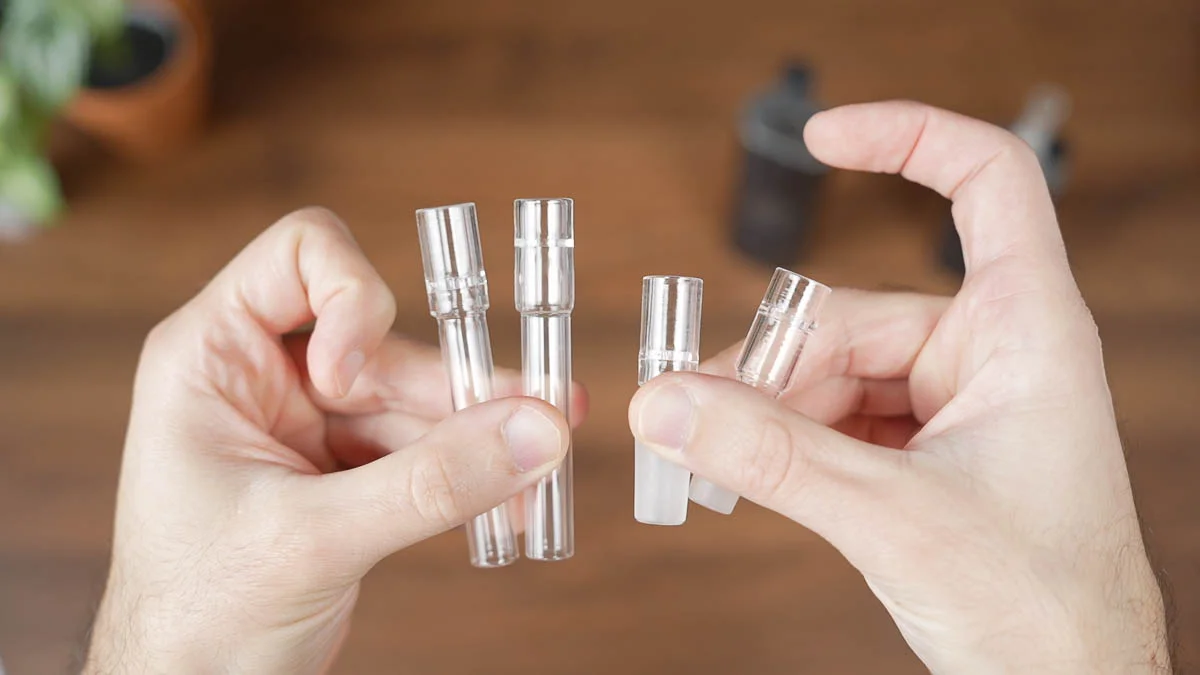
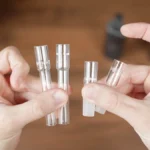
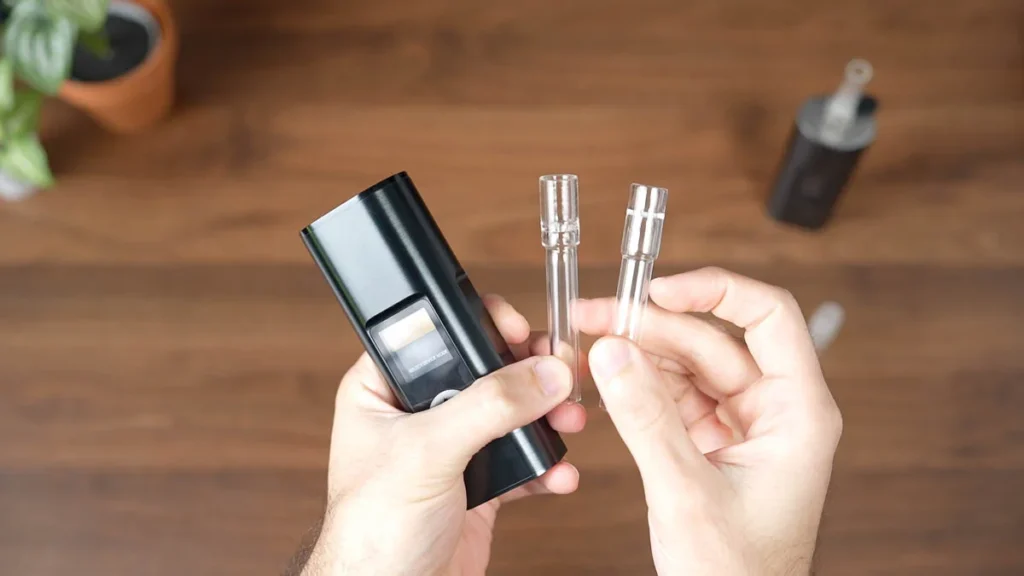
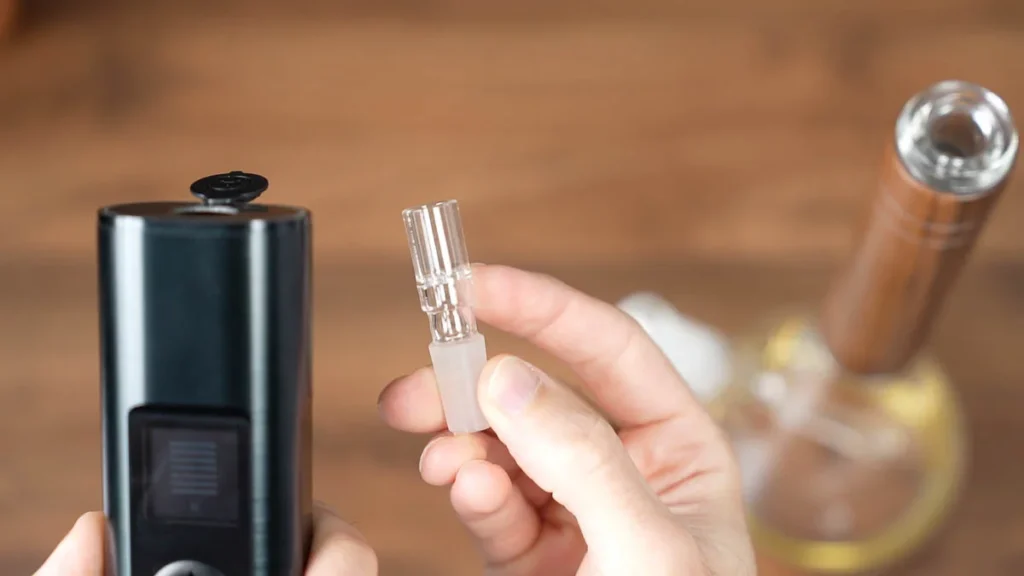
The Solo 3 comes with four stems-
- Two 90mm straight stems, one regular size, and one XL. These are used as a mouthpiece for direct inhalation.
- The two frosted glass stems are used to connect the Solo 3 to a water bubbler, again, one regular size and one XL.
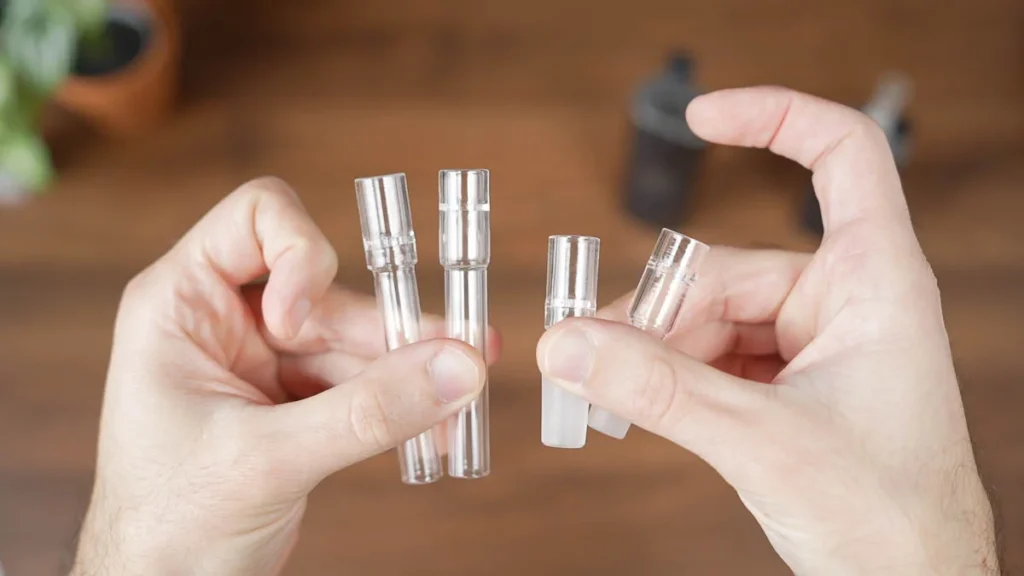
And if you’re wondering if you can use these XL stems in the Solo 2 or Air MAX, the answer is technically yes, but it wouldn’t make sense. Since the chamber is not deep enough to accommodate the XL stems, a lot of the herb will sit where the seal is and will not get any heat. So you’d be wasting a lot of herb.
How to load

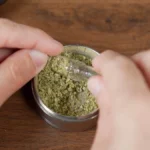
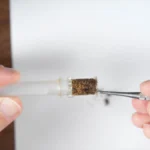
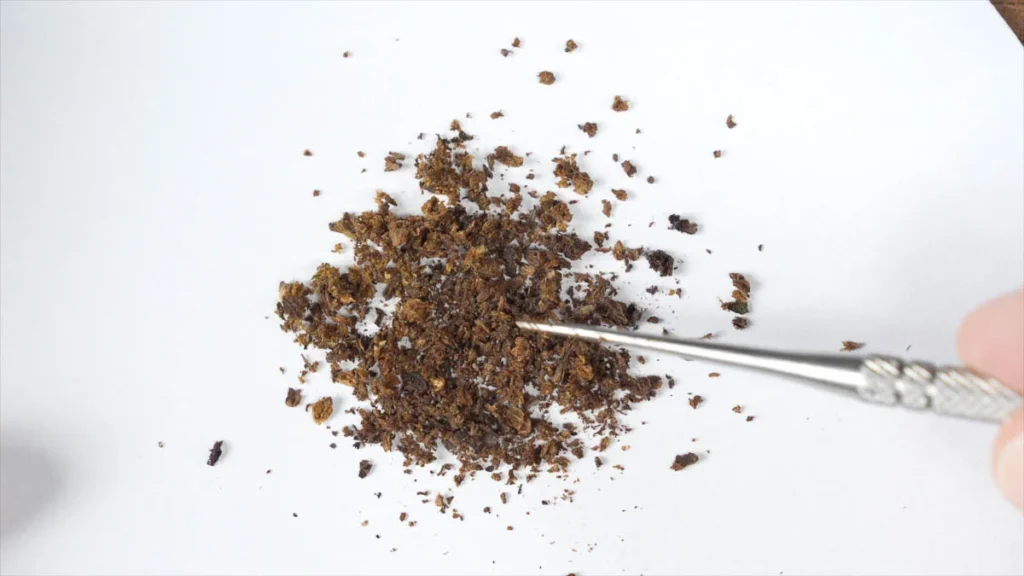
Loading the Arizer is as easy as it can be. I can load directly from the grinder, just turning the stem to gently fill up the cup with herb. Or, I can also load directly from a jar, just dipping the stem and gently turning. Then, I tamp it down with my finger and give the stem half a turn to pack it and make sure there are no loose particles.

You want to make sure that the herb is packed enough to stay together and not fall off if you flip the stem, but not too tight to restrict the airflow. Don’t overload the stems so the herb goes over the lip. Leave a small gap under the lip, so the herb doesn’t come in direct contact with the heating element when the stem is inserted.
Interface
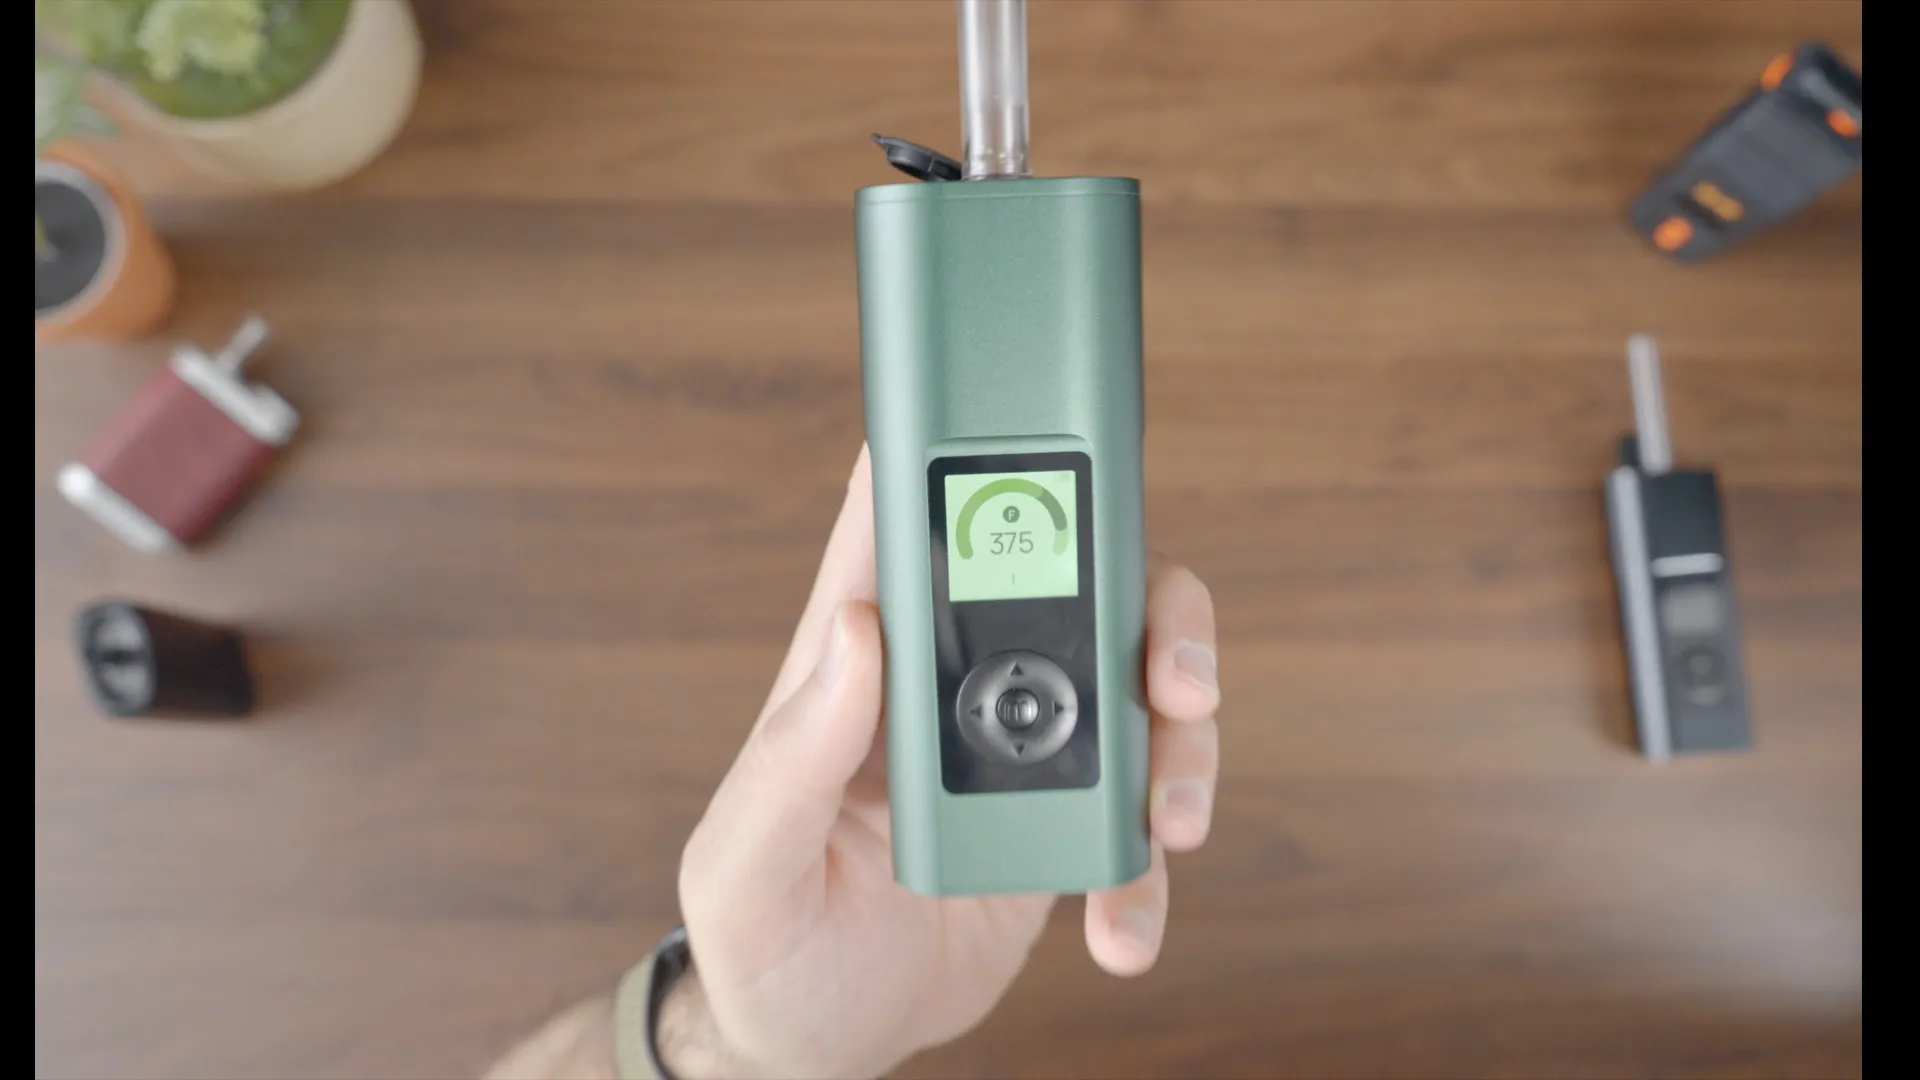
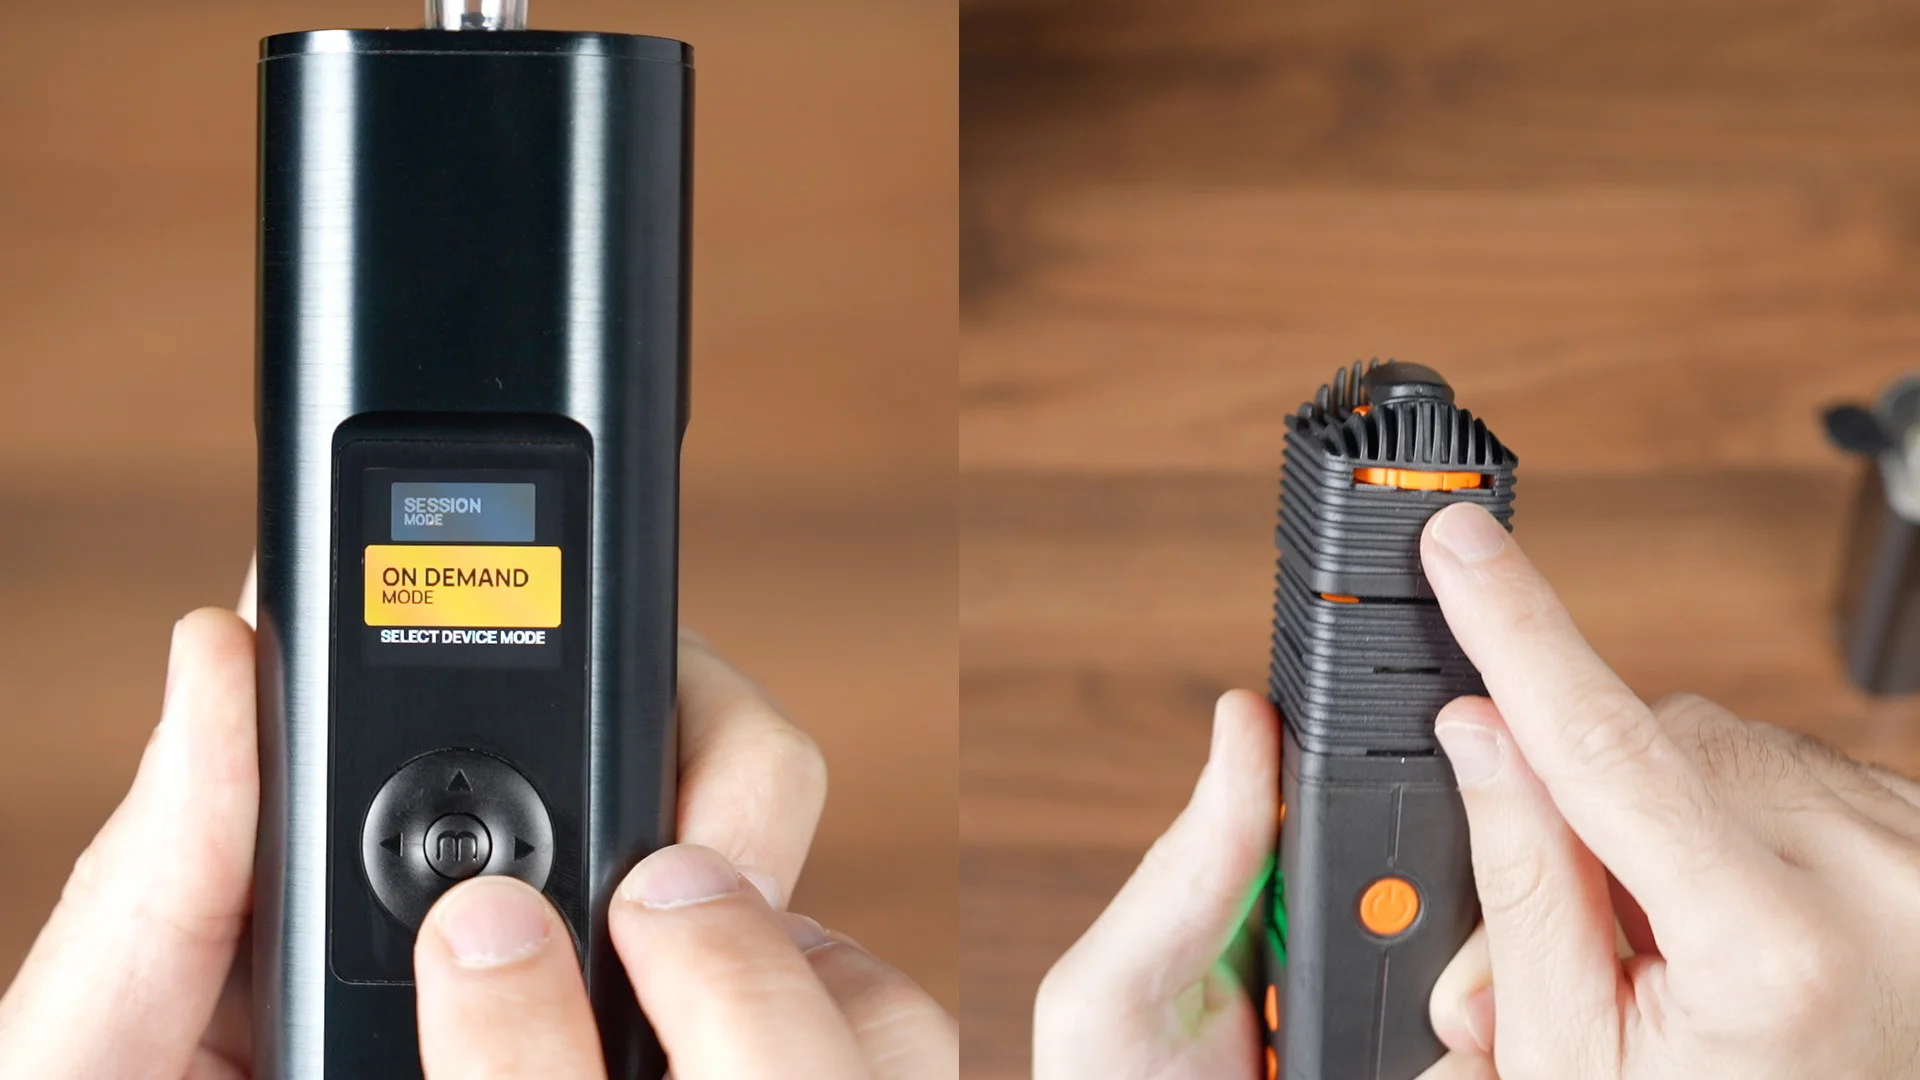
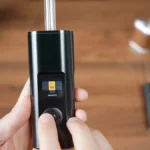
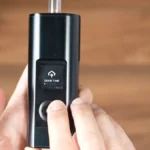
To unlock the Solo 3, I’ll hold the power button for three seconds and then enter the unlock sequence of left, up, right.
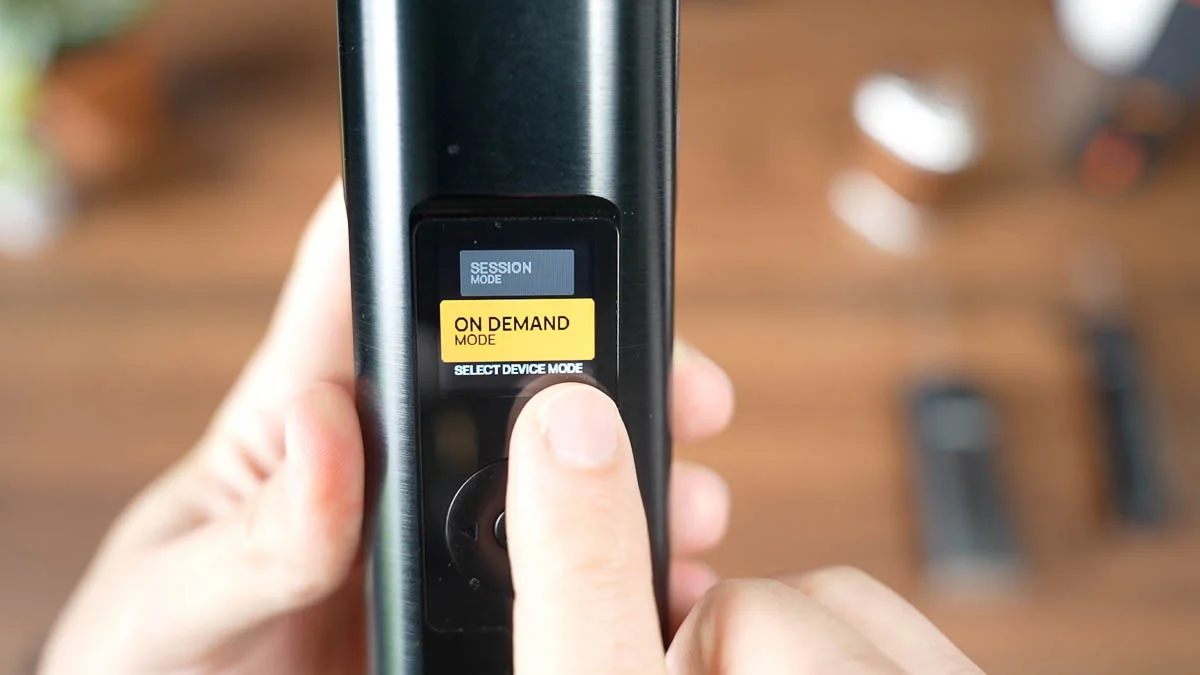
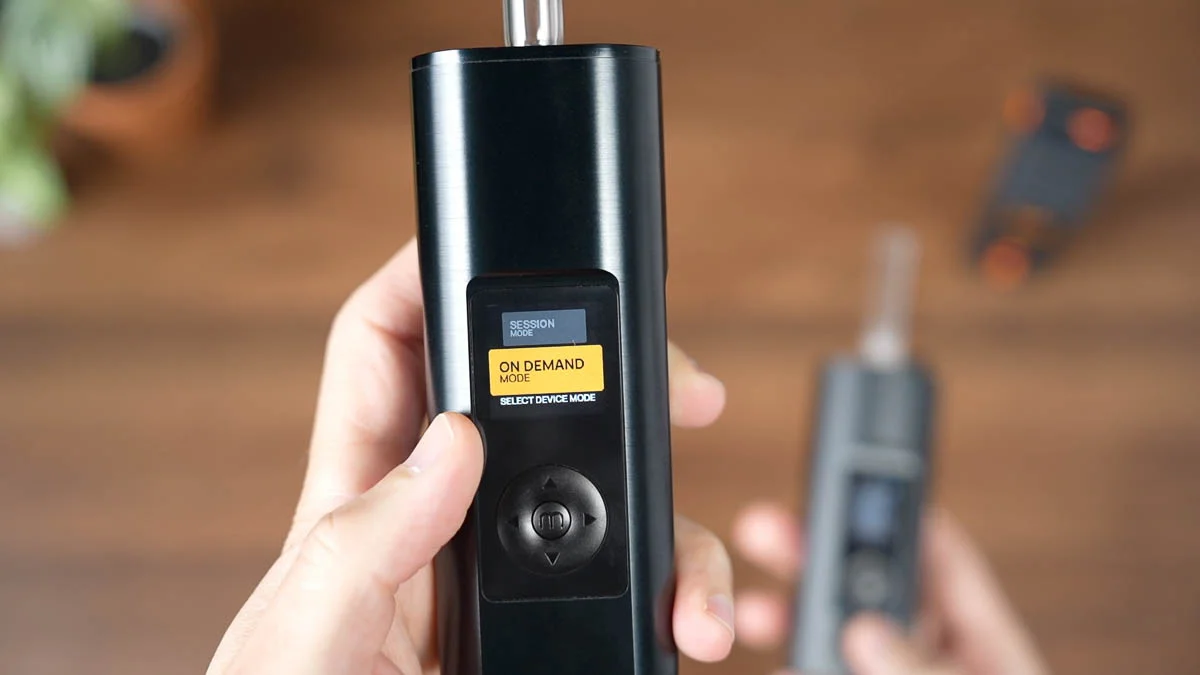
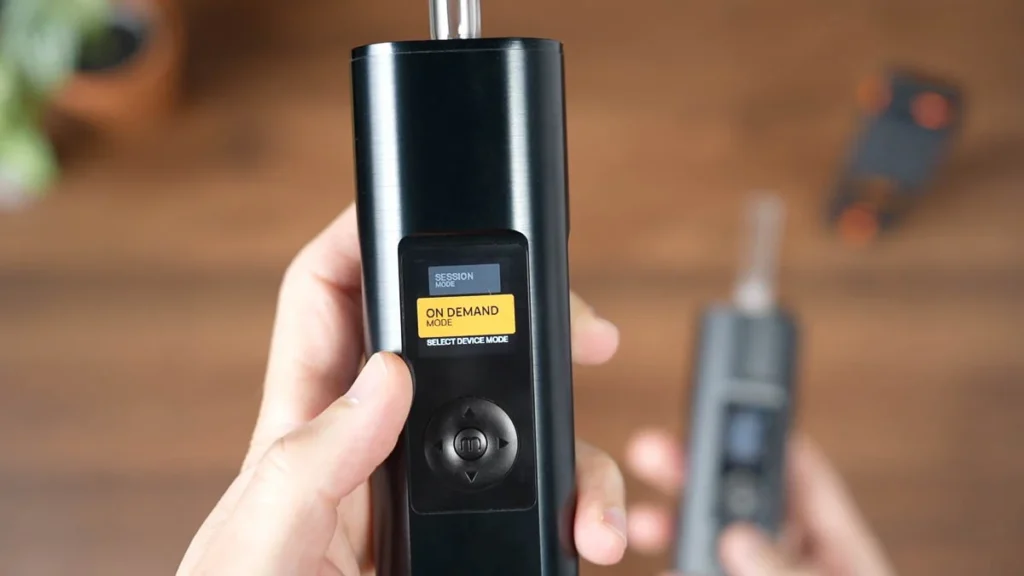
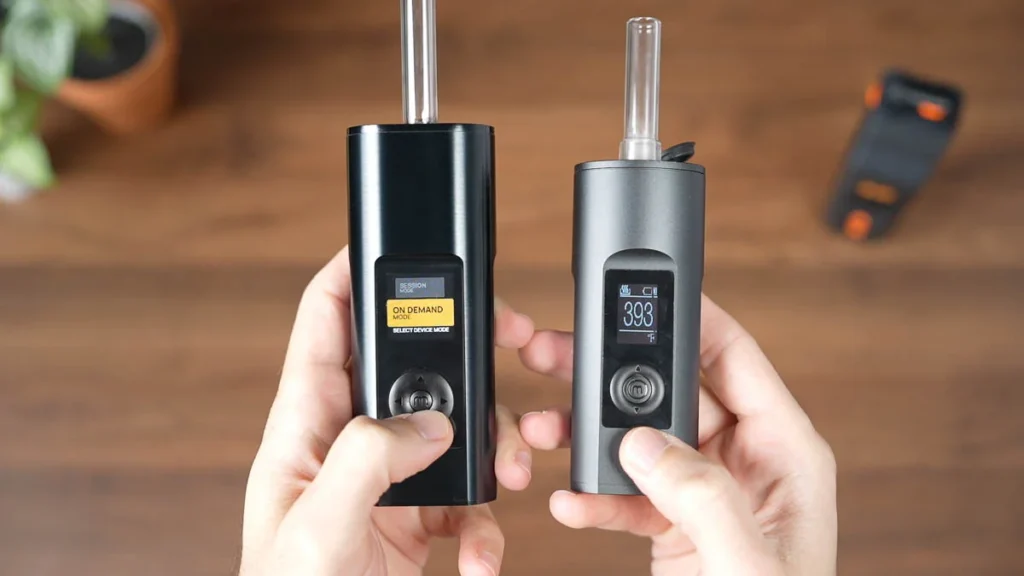
Now, you are presented with two options- Session mode or On-Demand mode. And if you’re a new user, you may not know how big of a deal that is. Let me explain.
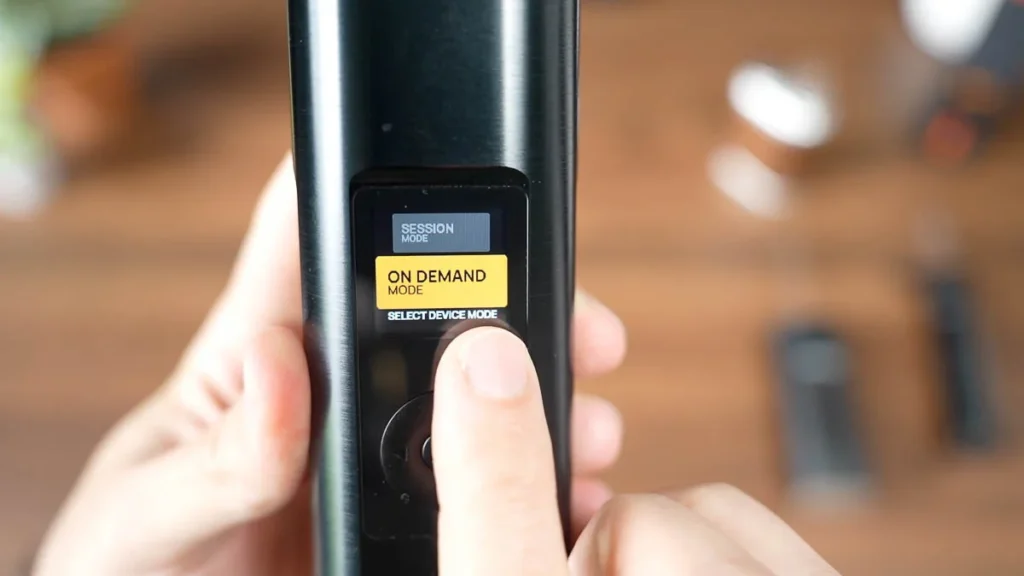
Until now, you had to choose between on-demand and session vaporizers. Very few offered both modes and executed properly. Two examples are the Tinymight 2 and the XLUX Ruffo, which are good vapes that have their pros and cons, but the Solo 3 takes it to a whole other level. Combining both methods into one vape is not trivial. Even the newly released S&B Venty only offers session mode.

Session mode
In session mode, you can set a precise temperature, and the vape will take around 15 seconds to heat up. Once it gets to the set temp, it stays there for the duration of the session, which is ten minutes by default. During that 10-minute session, the heat stays active, and the herb keeps “baking.” You can set the session duration to be anywhere between 5 and 20 minutes.

This mode allows you to sit back and relax, vape as you work, play, or maybe while watching a YouTube video. There is no waiting between inhales. The vape is ready for immediate use during the entire 10-minute session.
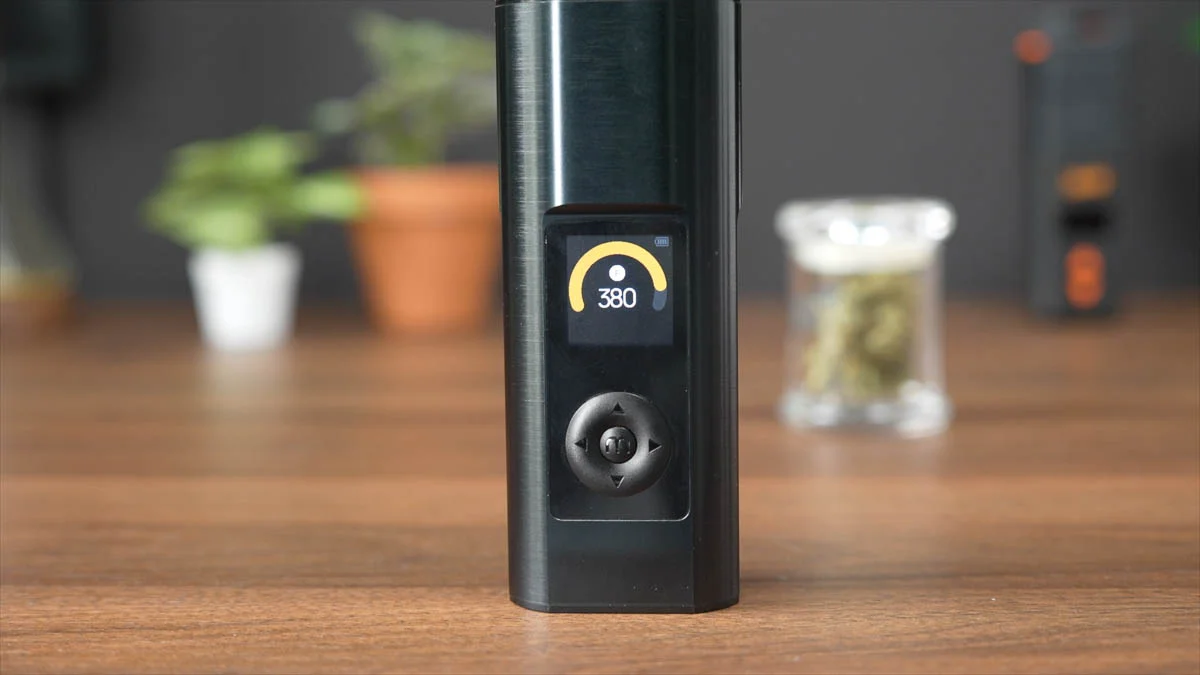
With the XL stems, on 380°F, I get around 4 to 6 amazing hits, and then the flavor slowly degrades over a few more inhales. At the end of the session, the herb is cashed and will need to be discarded.
You can double-click the button to select one of three presets, which you can customize to your preference. A very effective strategy is to start sessions low and enjoy the freshness of the flavor, and then bump it up to maximize extraction and increase the potency of the session. Presets allow you to do that quickly without fiddling around with the plus/minus buttons.
To go back to the mode selection screen, I’ll hold the left button.
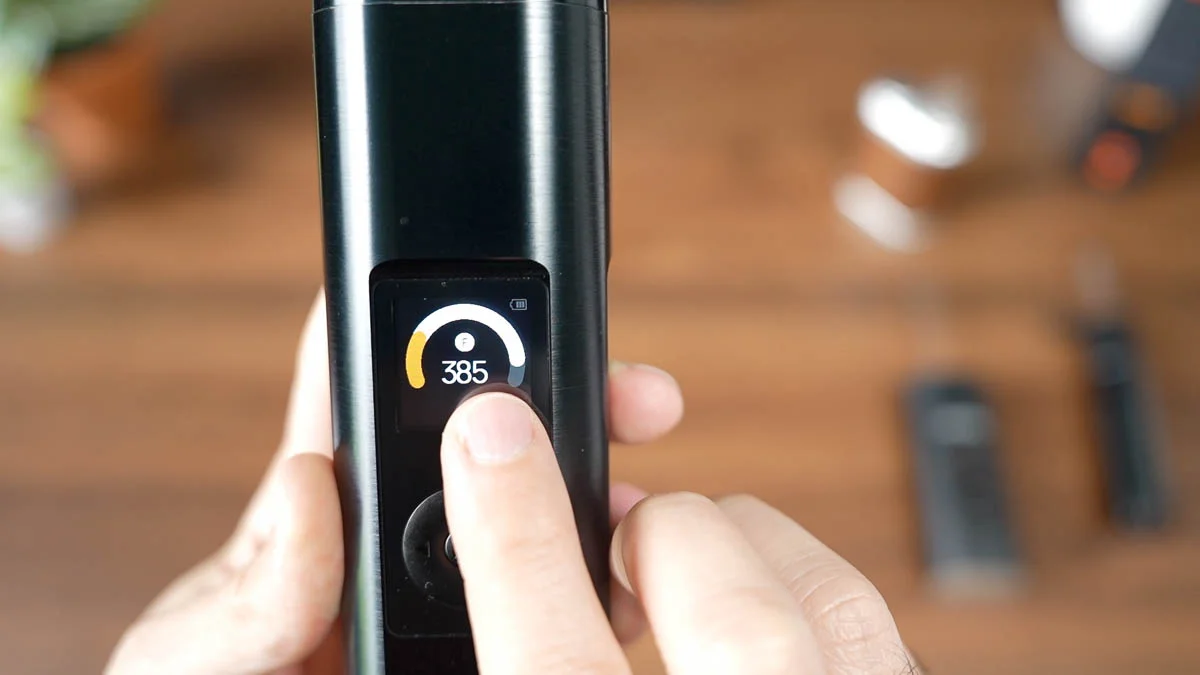
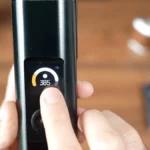
On-demand mode
With on-demand mode, the screen displays this progress bar, and once you click the main button, the vape starts heating up, as the bars become orange. Then it beeps to let you know it’s ready to vape, and you have ten seconds to inhale as the bars gradually retreat and become white. When it reaches the bottom and beeps, heat is no longer applied to the herb.

Unlike Session mode, the herb doesn’t “bake” in between inhales. It is heated only during the pre-heat window and the draw duration. So, each inhale is its own independent “mini session,” and one bowl can be split into multiple mini-sessions. The draw duration is ten seconds by default, but it can be set to anything between 5 and 25 seconds.

On-demand mode is suitable for quick, direct hits. You can take a hit, return an hour later, and take another one. It may not be as good and as flavorful as the first one, but the herb will mostly be preserved, especially when compared to Session mode.
I use On-Demand when I don’t have time for a full session or just want to microdose and take one good hit without wasting an entire bowl.
But make no mistake, this mode can get super intense. If you have the lungs for it, you can bump it to the highest temp and probably down an entire XL stem in one 25-second inhale. This is also the mode to use with a water bubbler.
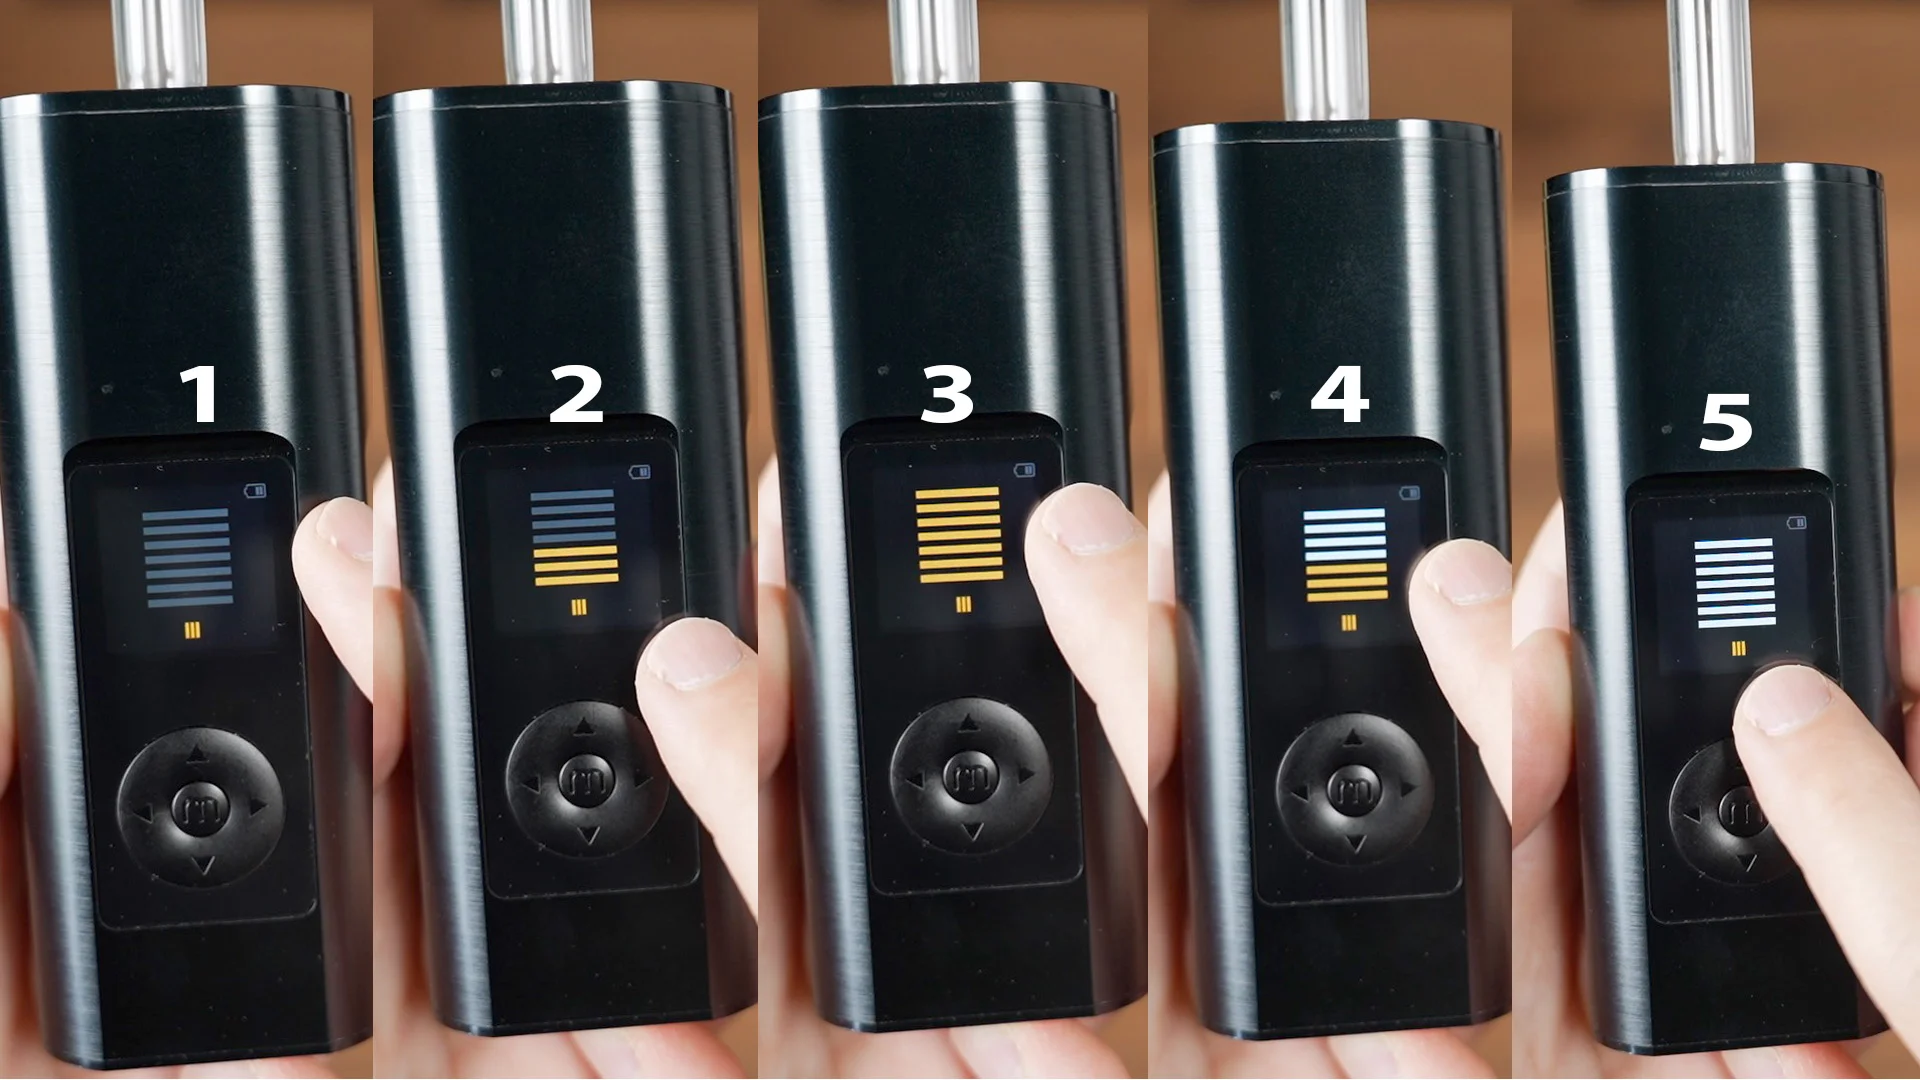
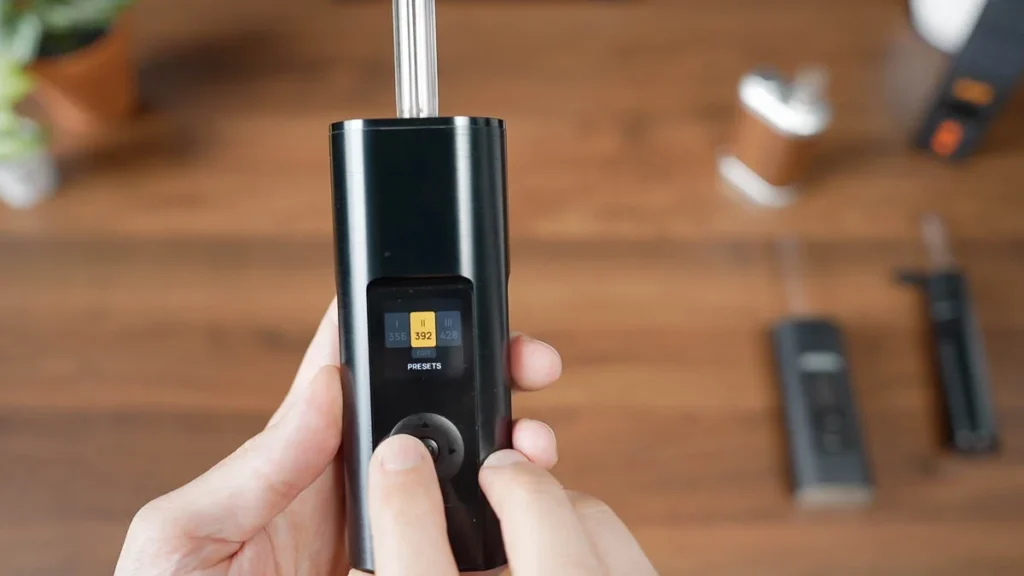
Double-clicking the main button will take you to the heat level selection, where you have five options between 356°F and 428°F. These are non-customizable presets, so you can not change them. You can always see which preset is currently active at the bottom of the display.
I usually use it in the middle setting, and with the XL stem, I get about 2-5 good hits, depending on my temperature, draw speed, and draw duration.
Which mode is better?
Which mode you choose is really a personal preference or whatever the situation calls for. Regardless, I can’t stress how groundbreaking it is to have both modes available on the same device. And both modes are executed perfectly in this case.

Both modes regulate and stabilize the oven temperature in real-time based on airflow rate, so the temperature stays consistent regardless of the speed and intensity of your inhalation.
Both models use a hybrid heating ratio of 80% Convection and 20% Conduction, meaning the herb is heated mostly by hot air flowing through, and less by direct contact with the heating element.
The Venty works with a similar system- the Conduction heat radiates into the the chamber, and in this case, the glass, to keep it warm, but the extraction itself happens with convection heat.
Other settings
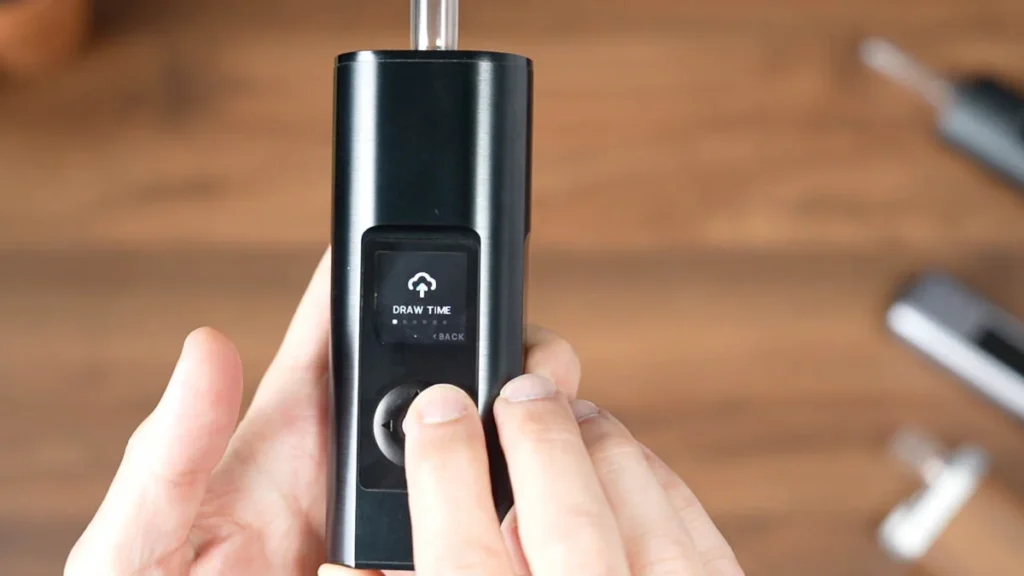
Holding the right button on either mode will take you to the settings screen, where you can set the draw duration of the on-demand mode, toggle between C°/F°, change notifications, brightness settings, and invertion, which we’ll get into later. You can also set the auto-shutoff to between 5 and 20 minutes.
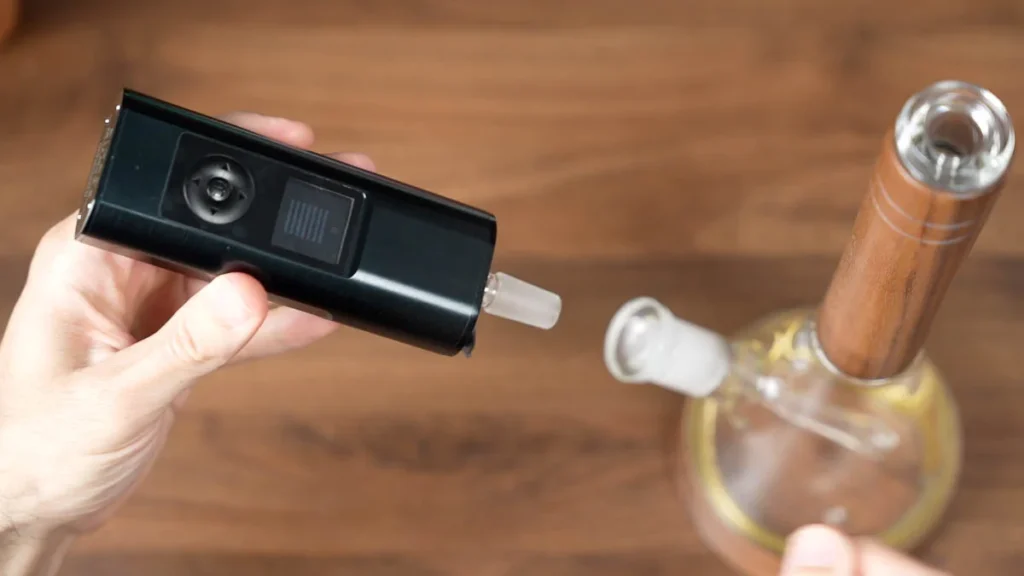
Use with bubbler
As I mentioned, the Solo 3 comes with two WPA glass stems, one regular size and one XL. These have frosted glass at the tip and will connect to any 14mm bubbler.
The display also flips when the device is inverted to show up upright, and in fact, the button controls flip as well. What was up is now down, and vice versa. So it’s easier and more intuitive to use while inverted.
Performance & vapor quality

As far as performance and vapor quality, it’s hard to overstate how good the Solo 3 scores. The vapor quality of Arizers is not new to anyone who has used their vapes before, but if you didn’t- know that this is as good as it gets. The glass stems keep the vapor pure and also cool it down substantially. The XL stems mean more flower, which means denser vapor and more flavor.
Extraction efficiency
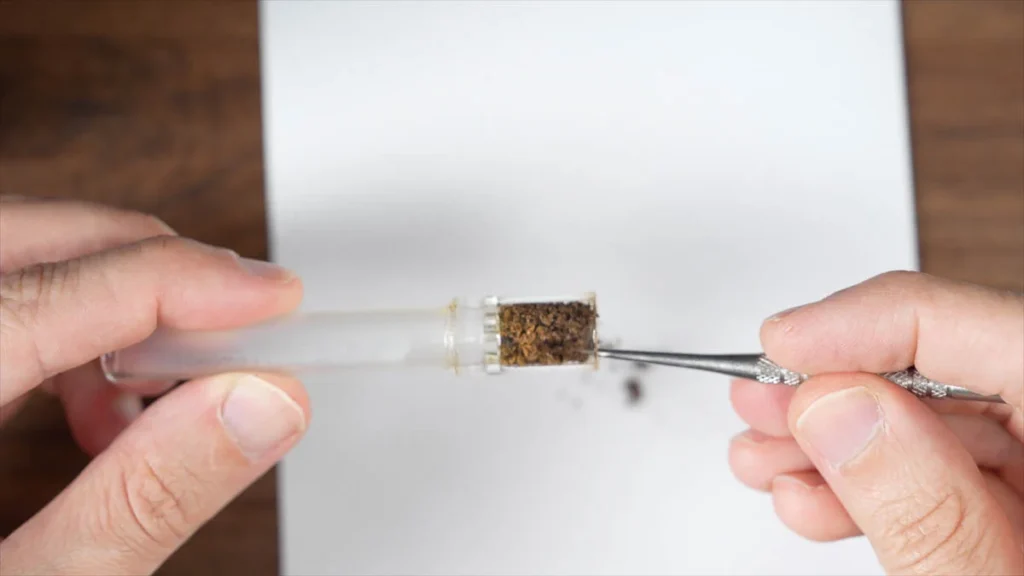
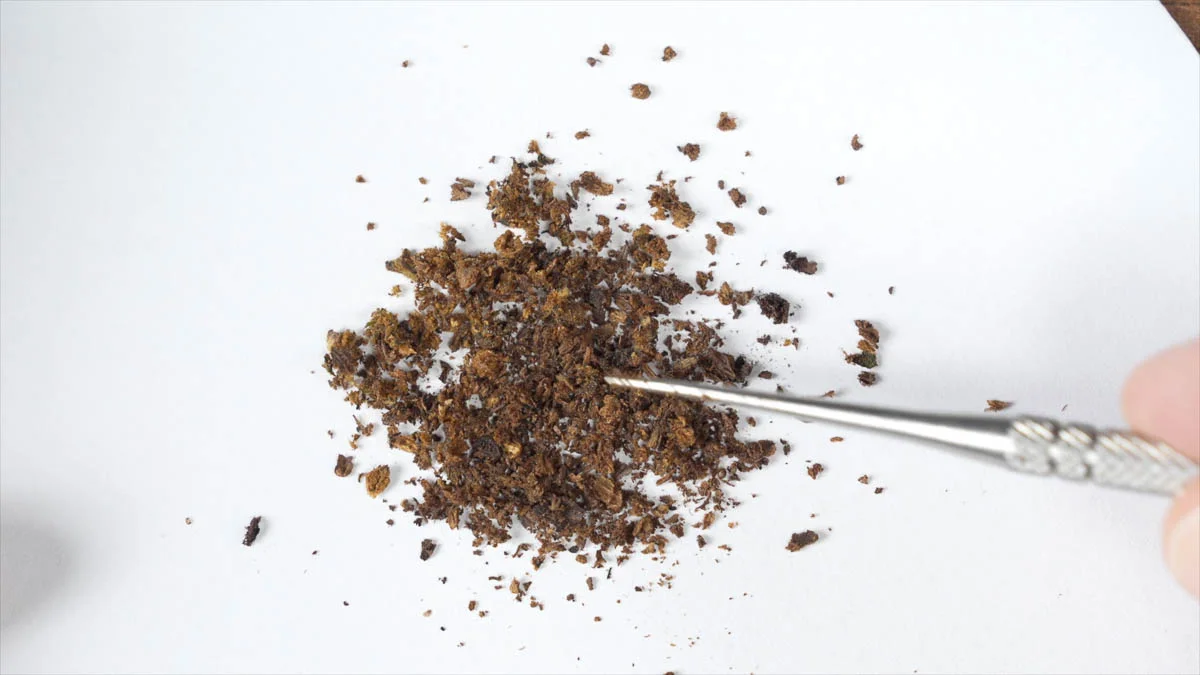
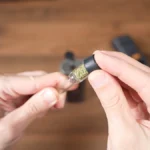
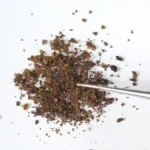
Looking at the AVB, you can see that it is brown and crunchy, which means excellent extraction. There are no green patches or unvaporized bud. I was so impressed by the consistency of the extraction. Efficient extraction means that you get the most out of your bud, and it is fully cashed when the session is over.
Since heat is coming into the stem from the bottom, that is the part that gets vaporized first and also the most. I found that at 380°F is when I start getting blackish herb at the bottom, but any temperature lower than that produces only brown, perfectly extracted herb.
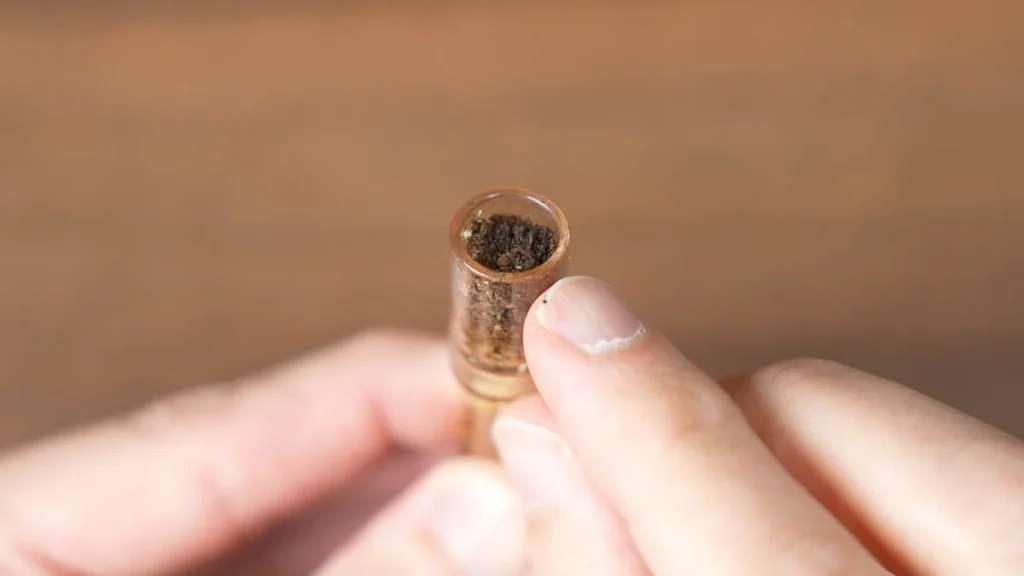
How far you go with your extraction is a personal preference. Some users like to vape at low temps and get amazing terpene flavor, and some like higher temps, which produce stronger effects. I personally found 380°F to be the ideal temp. Sometimes I will start slightly lower and end slightly higher, but I stay in that short range.
Battery life
Battery life is, once again, another area where the Solo 3 offers best-in-class performance. The battery is robust and I was able to get around 10 or even more, sessions on each charge. This is on par with the Venty, and the most you’d find in any portable out there.
What could have been better?

Well, if I really had to nitpick, I’d say that I prefer the old matte finish. It’s more fingerprint-resistant and looks better, in my opinion.
Also, the size may be a con for some people, but the Solo 3 makes up for its large size with so many other features such as battery life, flavor quality, and the fact the unit never gets uncomfortable hot to the touch, which is a problem many small vapes suffer from.
Sure, if you’re looking for something to use out of the house, this may not be your best option. But if you mainly vape in-house, like I do, the size doesn’t bother me, and if anything, I like larger units that are more sturdy and stable.
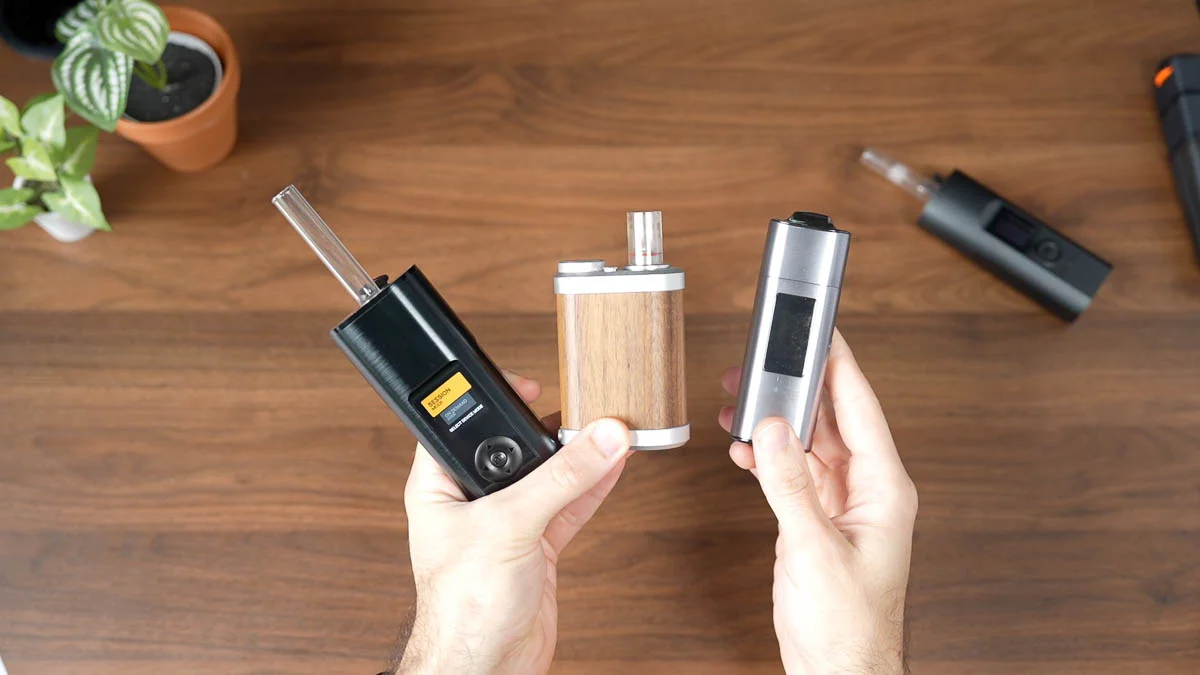
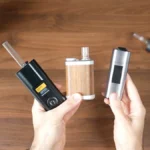
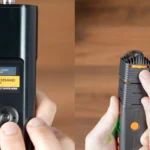
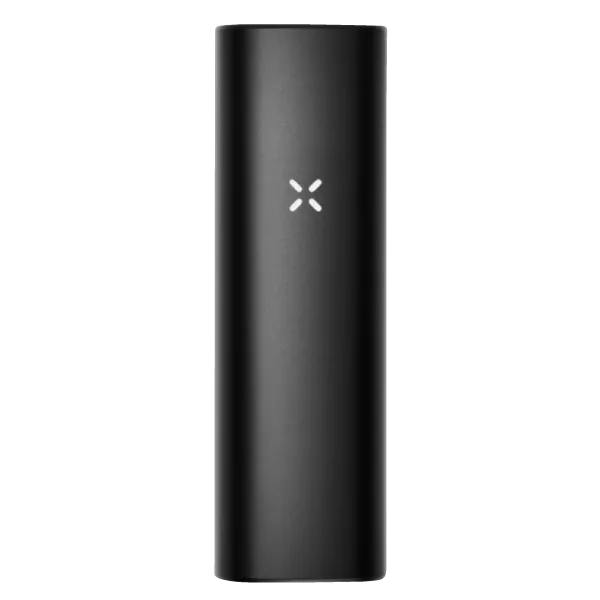
Solo 3 VS. Venty
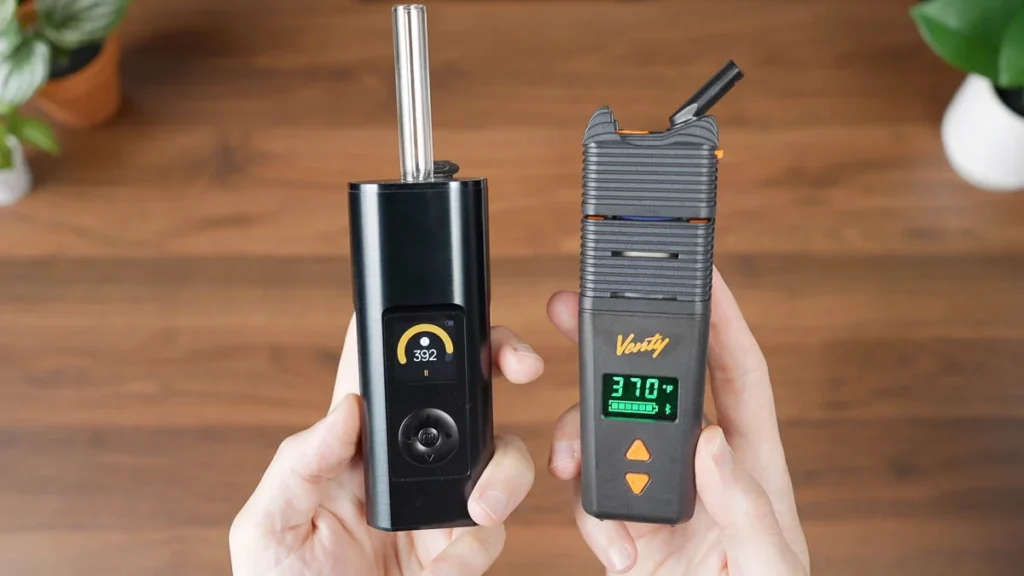
The only vaporizer that can go heads up with the Solo 3 is the Storz&Bickel Venty. They are more or less the same size, have a similar battery life, and have easy operation and maintenance. The Venty has amazing flavor, consistent and efficient extraction, and it is made to last by one of the top brands in the industry.

The Venty has a web app and airflow control, which the Solo 3 doesn’t. And the Solo 3 has on-demand mode, which the Venty doesn’t. I have a separate post comparing the two, but that’s the TL;DR.
Solo 3 vs Solo 2 (/MAX)
So you may be thinking, “Should I upgrade if I use the Solo 2?” And the answer is- hell yeah. If you’re a Solo 2 user and you like it, you will love the Solo 3! It may have become less “pocketable,” which I personally don’t mind, but it made huge improvements in all other areas.
The Solo 3 has a redesigned heating element, a larger chamber, XL stems, an updated screen, and it can be used as a session or on-demand vaporizer. That’s incredible.

Bottom line
If you can afford it, this is probably the best dry herb vaporizer for 90% of users out there. It is a revolutionary device and a perfect execution by Arizer. It currently retails for $344, well, actually, around $270 if you use the coupon above, and this price point may be a setback for some, but I think it’s worth every penny, and is easily one of the best dry herb vaporizers ever made.
Tips for best use
Here are some tips that will help you make the most of your Solo 3 (or any other Arizer vape):
- Perfect your inhalation technique. I recommend taking long, slow inhales. “Sip, don’t rip” definitely applies here, and you should experiment to find the intensity that works best. Another reason to inhale slowly is that fewer particles will get sucked in, especially if you’re not using the screens, which I don’t.
- If you’re looking to get the best flavor, start inhaling while the vaporizer is pre-heating. Different terpenes vaporize at different temperatures, so inhaling while it’s heating up will unlock amazing flavors and aromas. This can be done in both modes. Just keep in mind that not a lot of vapor will be produced at this stage.
- If you want full, potent, dense hits from the first inhale, let the vape sit for an additional 10-20 seconds after it reaches the set temperature. This will allow heat to build up in the chamber and heat up the flower for a fuller, denser hit. This is only applicable to session mode.
- Empty the glass stem immediately after finishing a session. Use a brush to remove any small particles that may block the holes of the glass and reduce airflow. Letting the cashed herb stay in the oven will make it stick to the glass and get it dirty a lot faster.